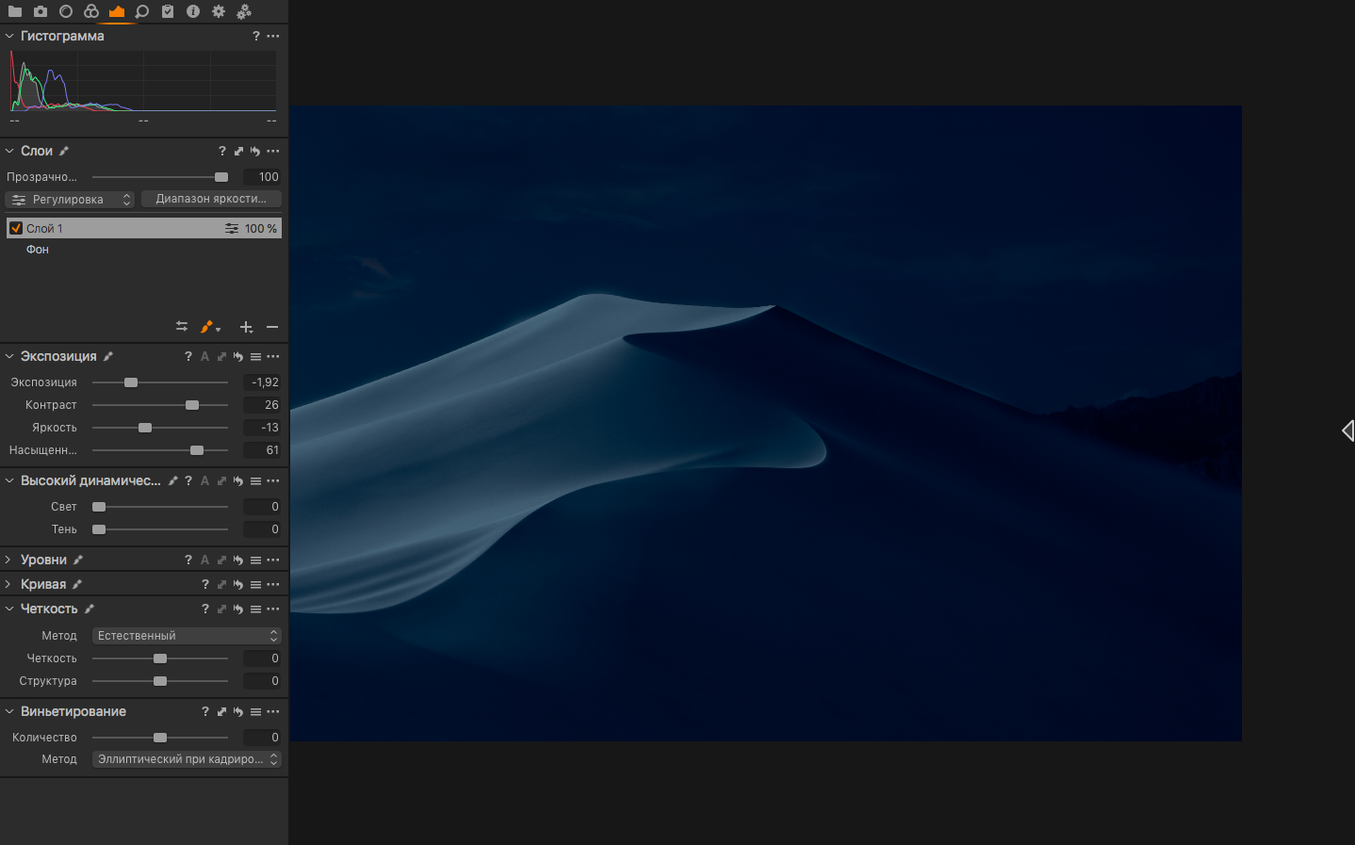
Enhanced denoise is the kind of tool you reach for when a high-ISO shot needs to keep its texture — here's how that fits with the rest of the toolkit.
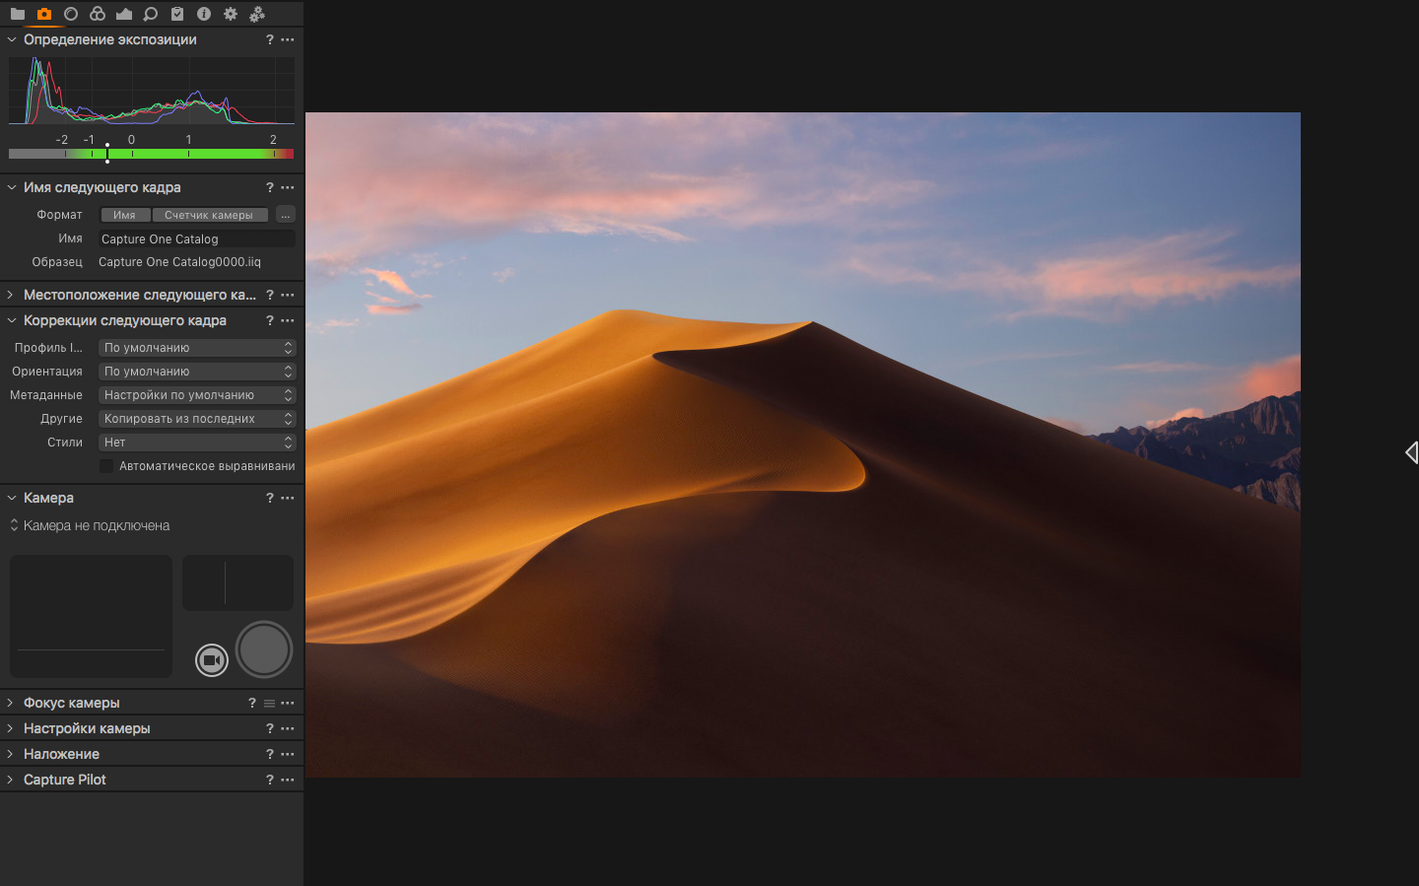
RAW processing — Capture One is a professional RAW photo converter, treating each file as a full starting point rather than a flattened preview.
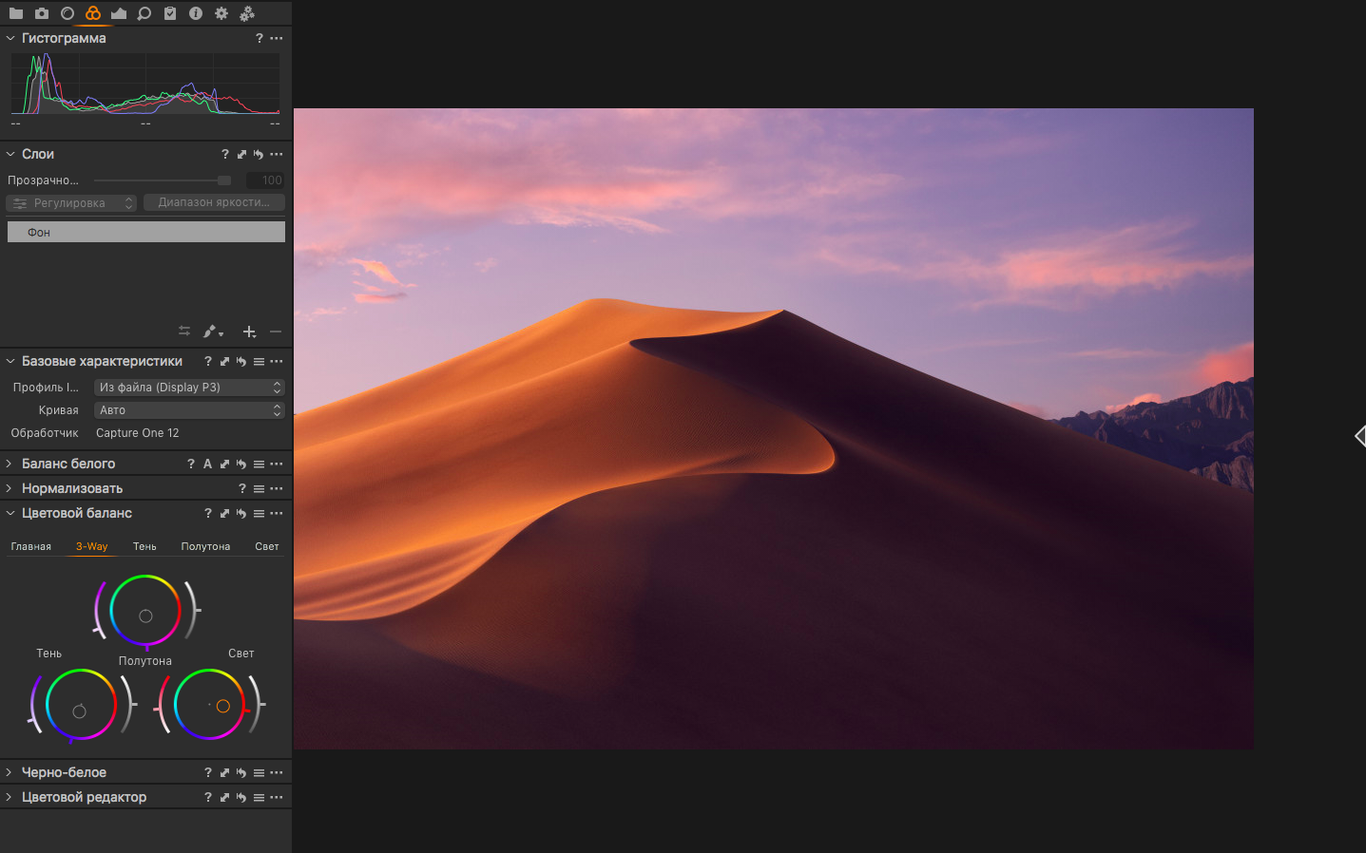
White balance — Use color temperature and tint sliders, or grab the eyedropper and click a neutral gray point in the image.
Correction variants — You can create multiple looks for the same shot, and each variant still starts from the original RAW data, so nothing gets baked in too early.
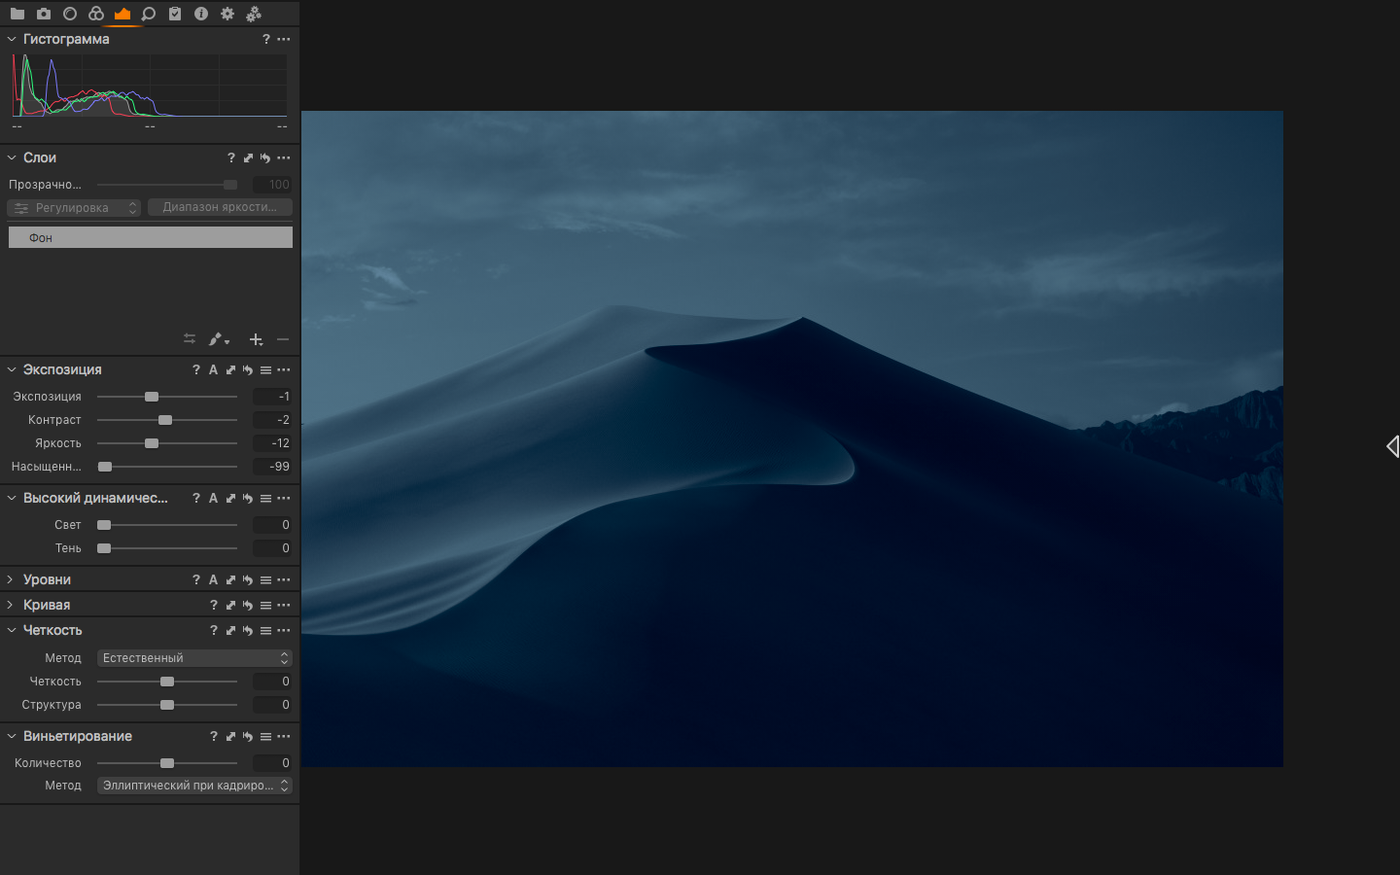
Sharpness — Fine-tune edge definition across the frame without pushing the whole image into a harsh look.
Plug-ins — A developer portal means the app can grow with the tools you already rely on.
Tethering that reshapes a studio workflow
Not every Mac user needs a RAW converter this deep. The people who genuinely feel the difference tend to fall into a few clear groups.
Studio portrait and fashion photographers are the first that come to mind. Tethering changes everything when you have a client or art director standing behind you, and Capture One was built with that cable running straight from camera to Mac. The live view, the instant overlay checks, the ability to apply a look before the model changes pose — those aren't afterthoughts here.
Commercial product photographers who obsess over color accuracy. When a catalog needs the crimson of a handbag to match across thirty frames under mixed strobes, the color editor and the way the app reads camera profiles give you a fighting chance at consistency that lighter editors simply don't aim for.
High-volume wedding and event shooters get a different kind of value. Culling a thousand RAW files from a ceremony and reception, applying a base correction to batches, then spinning off a handful of variants for the hero shots — that workflow leans hard on sessions and the variant system. You process the keepers without duplicating gigabytes of source files.
Landscape and fine-art photographers who print large. The sharpening and noise reduction tools are tuned for print output, not just screen viewing, and the soft-proofing with CMYK profiles matters when you're sending files to a lab that still runs offset presses.
If you shoot mostly JPEGs, use a single-look preset on everything, and rarely print, you're probably carrying more tool than you need. The app rewards people who want control over the pipeline from shutter click to final export — and who don't mind learning where the controls live.
A scenario where it earns its keep
Imagine a small studio team shooting a fall lookbook for a clothing brand. Three racks of garments, two models, one long day. The photographer is tethered to a MacBook Pro running Capture One. The art director stands off to the side with a calibrated display on a separate table.
As each outfit comes through, the RAW files appear on the photographer's screen within seconds. The art director calls out small tweaks: the olive trench coat reads too yellow under the key light, the scarf needs a touch more definition. The photographer adjusts white balance with the eyedropper on a known neutral patch from the first frame, then syncs that across the last ten shots. The color editor nudges the green channel without shifting the skin tones. A quick variant gets a punchier contrast treatment for the brand's social media cut-downs, created from the same RAW file without duplicating work.
By wrap time, the selects are already tagged, the basic color is dialed in, and the web variants are exported as full-size JPEGs alongside the print-ready TIFFs. Nobody stays late re-processing from scratch. That tight loop — capture, review, adjust, approve — is the kind of workflow Capture One was designed around.
Editing a 200-frame golden-hour shoot
Let's walk through a typical evening edit. You've just come back from a golden-hour shoot — about two hundred frames from a single location, varying light, a mix of wide and close-up shots.
You launch Capture One and create a new session, pointing it at a folder on an external SSD. The images import with minimal delay. The browser fills with thumbnails, and you start culling. Arrow keys move you through the sequence; a quick star rating with the number keys flags the ones worth keeping. The ones with missed focus or awkward expressions get a red color tag so you can filter them out later.
You land on a keeper — a backlit portrait where the subject's face is a little too shadowed. You pull up the exposure controls and lift the shadows slider gently. The face opens up without blowing the rim light on the hair. A small clarity adjustment brings back texture in the jacket fabric. You grab the white balance eyedropper and sample a concrete wall in the background that you know was neutral gray. The warmth settles into something true to what you saw on location.
You want a second look for this frame — a monochrome version with more contrast. Instead of duplicating the file, you create a new variant. It inherits nothing except the original RAW data, so you can push the black-and-white conversion and add a tighter crop without affecting the color version sitting right beside it in the browser. Both variants live under the same thumbnail, toggleable with a click.
With the first round of edits done, you select the ten best frames and open the batch export panel. You set one recipe for full-resolution TIFFs in Adobe RGB for archiving, and a second recipe for sRGB JPEGs at 2048 pixels wide for a client gallery. You hit export, and the Mac's fans stay quiet while it churns through in the background. While it runs, you keep editing — no locked interface, no progress bar blocking your screen.
Twenty minutes in, the shoot is processed, exported, and ready to deliver. The session file remembers every adjustment, every rating, every variant. Next week you can open it and pick up exactly where you left off.
Snags to watch for and how to work through them
Every deep tool has its friction points. Here are a few that trip people up and what usually sorts them out.
Tethering drops mid-shoot. It happens, especially with longer cables or busy USB hubs. First thing to check is the cable itself — a loose connection at the camera port is the most common culprit. If the connection flickers, try a shorter, higher-quality cable or plug directly into the Mac instead of through a hub. In Capture One's preferences, you can set the tethering reconnection behavior to be less aggressive; sometimes the auto-reconnect routine itself causes hiccups. If all else fails, quitting and relaunching with the camera already powered on and connected usually re-establishes the link cleanly.
Previews look different after export. This one confuses newcomers. The viewer uses a proofing profile that may not match your export recipe's color space. Check that you're viewing with the same ICC profile you intend to export with — the proof profile dropdown sits near the top of the viewer, easy to overlook. Also worth confirming your monitor is calibrated; no software can compensate for a display that drifted months ago.
The catalog gets sluggish. Large catalogs — tens of thousands of images — can slow down browsing. Sessions tend to stay snappier for active projects because they keep things self-contained. If you prefer catalogs, regularly rebuilding the preview database and storing it on fast internal storage rather than a network drive helps. Some photographers split their work into yearly catalogs instead of one massive archive.
Keyboard shortcuts stop responding. Occasionally a system-level shortcut conflict steals input. If your rating keys or arrow navigation suddenly go dead, check whether another app — or even a macOS input source switcher — is intercepting those keystrokes. Switching to a standard U.S. keyboard layout while editing often clears it up.
Variant confusion. People sometimes think variants are independent files and delete the original, expecting the variant to survive. They don't — all variants share the same source RAW. If you delete the RAW, every variant goes with it. The fix is just understanding the relationship: variants are instructions layered on a single file, not separate copies.
The up-arrow key that copies every edit instantly
Some of the best bits hide in plain sight. A few that make daily editing smoother:
- Copy adjustments from the previous image. The up-arrow key copies every adjustment from the last image you edited. No dialogs, no clipboard. Great for sequences shot under the same light.
- Local adjustments with the brush. You can apply almost any global adjustment locally — exposure, clarity, color balance — by painting a mask. Hold
Optionto erase with the same brush size and softness. - Focus mask overlay. Hit
Qto see which parts of the image are in sharpest focus, highlighted in green. It's faster than zooming to 100% on every frame during culling. - Process recipes run in parallel. You can export TIFFs for print and JPEGs for web simultaneously from the same batch. Set up your recipes once, then enable both checkboxes when queuing exports.
- Straighten with the rotate cursor. Place the cursor just outside a corner handle in the crop tool and it switches to a rotation cursor. Drag along a horizon line and the tool reads the angle directly from your movement.
- Color tag filtering. Beyond star ratings, the color tags — red, yellow, green, blue, purple — give you a second axis for sorting. Use stars for quality and colors for status: red for rejects, green for client selects, blue for portfolio picks.
- Reset individual sliders with a double-click. Not every adjustment needs the full reset button. Double-click any slider handle to return just that parameter to its default, leaving the rest of your edit intact.
Tip: If you process a lot of high-ISO concert or wedding work, try the enhanced denoise on a variant first, then compare side-by-side with the original at 100% before committing it to the whole batch.
Tip: If you shoot in changing light, set white balance once on a gray card, then copy that setting across the session.
Version 16.8 brings a few practical updates:
- Enhanced denoise for cleaner high-ISO files.
- Assisted review to speed up culling.
- New contact sheets for better session overviews.
- macOS 12 or later
- Intel or Apple Silicon Mac
- Interface languages: Russian, English, German, Spanish, Italian, Simplified Chinese, Korean, Portuguese, Ukrainian, French, Japanese
Questions from the stall
What macOS version does Capture One need?
It is compatible with macOS 12 and later, on both Intel and Apple Silicon Macs.
Can I make multiple edits of the same RAW file?
Yes, each correction variant uses the original RAW file as its starting point, so you can compare different looks without degrading the source.
How do I set accurate white balance?
Use the eyedropper on a neutral gray point in the image, or fine-tune with color temperature and tint controls.
Notes from other shops 0
Sign in or open a shop account to leave a note.
No notes yet. If you've used this on a shop Mac, tell me how it went.