Small-shop owners, landlords, and anyone rearranging a room often reach for Sweet Home before touching a pencil. It's the kind of tool that suits people who want a workable plan without a CAD background, and it runs just fine on a Mac.
- Draw the outer walls and one interior partition on a single level, then drag the corners until the measurements match the real room.
- Place windows and doors from the built-in catalog — over 1,400 objects means the odd-sized pantry door you need is probably already there.
- Change wall, floor, and ceiling colors or textures so the plan feels like the actual space, not a generic floor sketch.
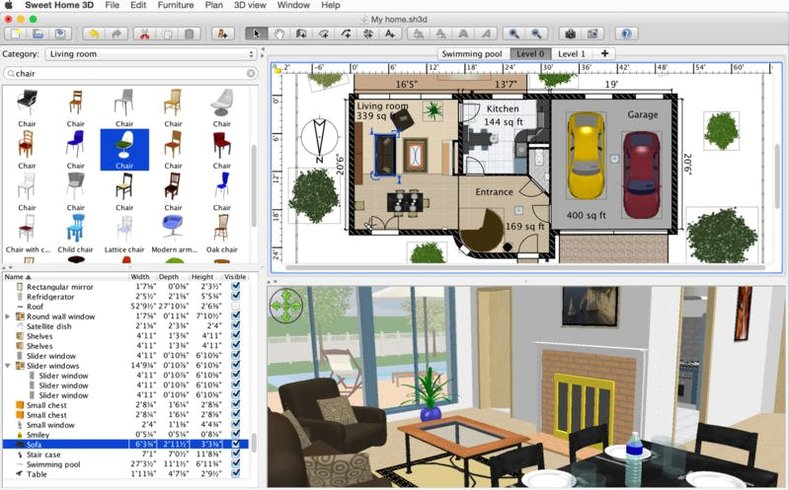
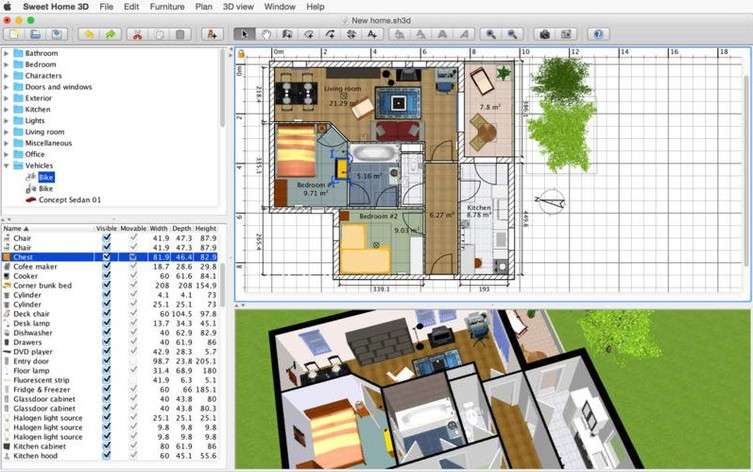
- Drop in furniture and nudge pieces around while the 3D view updates alongside the floor plan.
- Print the plan and 3D view together for a contractor or a landlord who likes paper.
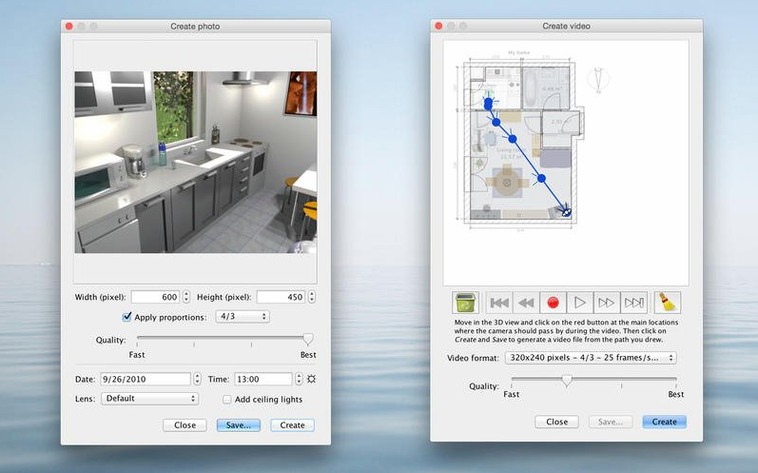
- Set the sun position and create a photorealistic image of the finished room for a listing or a quick design check.
Working from plan to 3D view in one window keeps the whole task honest — what looks fine from above sometimes shows its problems once the camera is at eye level. For a single room or a small apartment, the flow feels practical rather than fussy.
Pull a wall from a sticky note measurement
Most of my sessions start with a blank plan and one rough measurement — maybe a wall length I jotted on a sticky note. I pull the wall tool across the grid, type the exact dimension into the floating panel, and watch the line snap to length. That first rectangle becomes the shell of a room, and from there the session develops its own rhythm.
I add a second level only when the space demands it — a loft, a split entry. Sweet Home handles stacked floors without making a ceremony of it. I copy the footprint from level 0 to level 1, adjust the ceiling height, and suddenly the staircase has somewhere to go. The 3D view lets me switch between aerial and visitor perspective with a single click, so I can check sightlines from the sofa while the floor plan still shows the whole layout.
Furniture placement becomes a process of swapping and resizing. I drag a sofa from the catalog, open its properties, and dial the width down to match a vintage piece I already own. The texture editor is basic — no layered materials — but picking a warm wool-like finish and darkening the legs to match my actual furniture makes the render feel personal. I set the light and sun position to late afternoon, because that's when the west-facing window floods the room, and the photorealistic render shows me whether the reading chair ends up in glare.
Before I close the session, I export two files: a PDF of the floor plan with dimensions, and a wide-angle PNG of the 3D view for my notes. The whole thing took under an hour, and I opened no other app until the exporting step.
How a landlord might use it
Imagine someone who owns a three-unit building and needs to show a prospective tenant how a vacant apartment will look furnished — without hauling furniture up two flights of stairs just for staging. They measure each room with a laser tool, sketch the walls in Sweet Home, and pull a dining set and bed frame from the catalog. The objects aren't photorealistic masterpieces, but they read clearly as furniture, which is what matters when someone is trying to picture their own things in the space.
They tweak wall colors to match the fresh paint they just put up — a soft grey-green in the bedroom, clean white in the kitchen — and take a video walkthrough that starts at the front door, pans through the living area, and ends at the back bedroom window. The exported MP4 is small enough to text or email, and the tenant gets a feel for flow before ever stepping inside. For a quick rental listing, a couple of rendered stills and the floor plan PDF do more than a dozen wide-angle phone photos ever could.
Export clean OBJ geometry to a 3D street scene
Sweet Home plays well as a starting point. I sometimes export an OBJ model and bring it into a dedicated 3D app for better lighting or to place it inside a full street scene — the geometry is clean enough that it imports without drama. For texture work, I pull a rendered image into a photo editor, adjust contrast and warmth, and drop it straight into a listing template or a shared album. The SVG export is useful too: I open the plan in a vector app, strip away the furniture for a clean footprint, and hand it to a contractor who wants to mark up plumbing and electrical on his own layers.
On the macOS side, the app feels at home. It respects standard keyboard shortcuts, the file dialog is the familiar Mac one, and dragging images or models from Finder into the plan window just works. Quick Look previews of exported PNGs and PDFs mean I can check an export without launching Preview. And because it stores plans as a single XML-based file, I keep them in a synced folder and open yesterday's plan on a different Mac without conversion or fuss. For anyone hunting down a straightforward way to plan a space — whether they found it searching for 3d sweet home or stumbled on a Sweet Home 3D torrent — the real thing is refreshingly direct, and many users find cracks and workarounds simply aren't necessary to get started.
Version 7.5.7 tidies up a few loose ends in the 3D view:
- Fixed synchronization issues in the separate 3D view window.
- Fixed rendering of underground levels at the same elevation.
- Fixed font display in the Thai interface.
- macOS 10.9 or newer
- Works on both Apple Silicon and Intel 64-bit Macs
Questions from the stall
Can I import my own furniture models into Sweet Home?
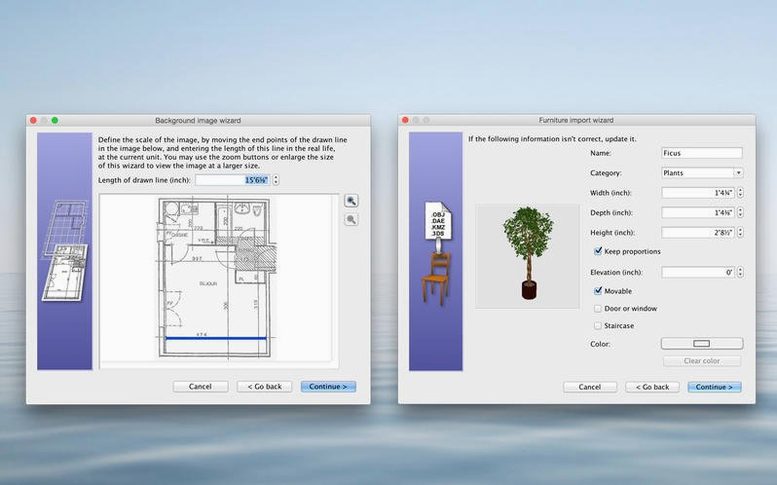
Yes. You can import 3D models you've made yourself or downloaded from the internet, which is handy when the built-in catalog doesn't have the exact piece you need.
Notes from other shops 0
Sign in or open a shop account to leave a note.
No notes yet. If you've used this on a shop Mac, tell me how it went.