
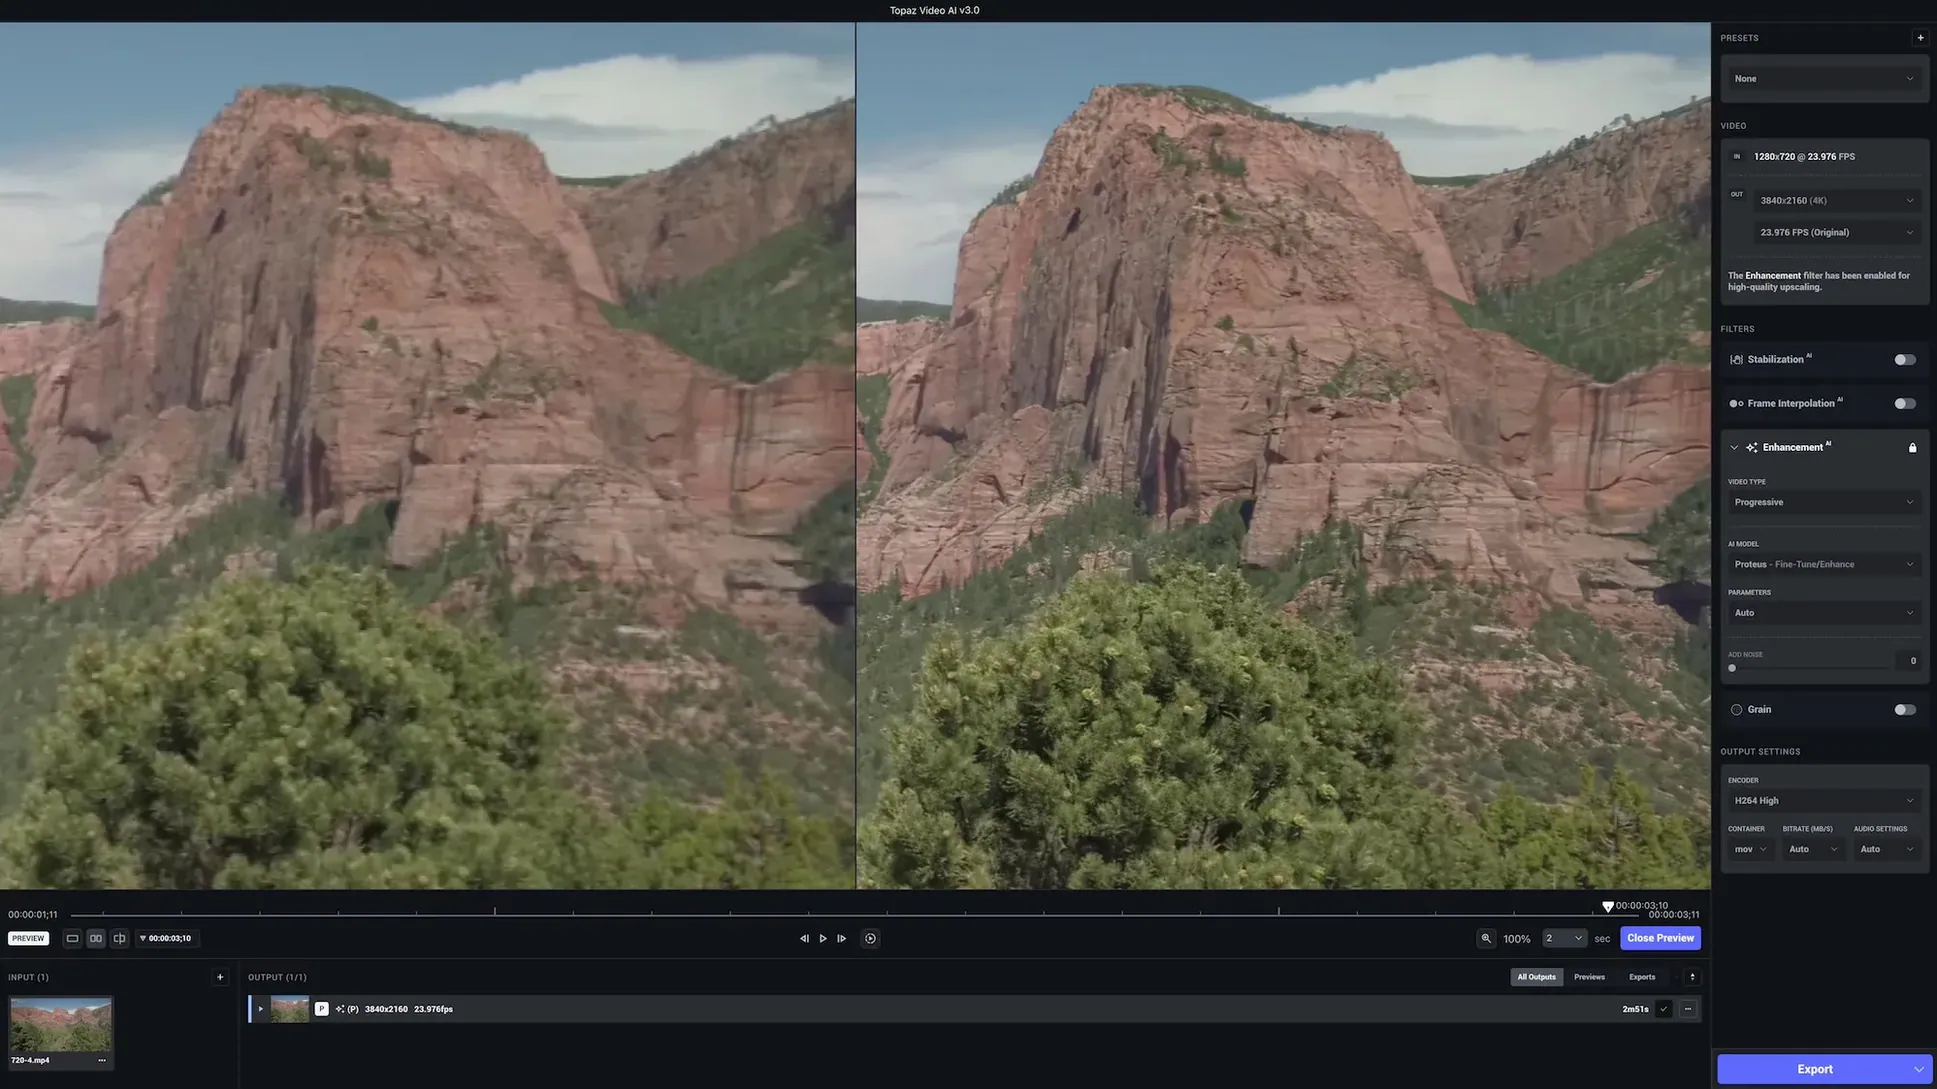
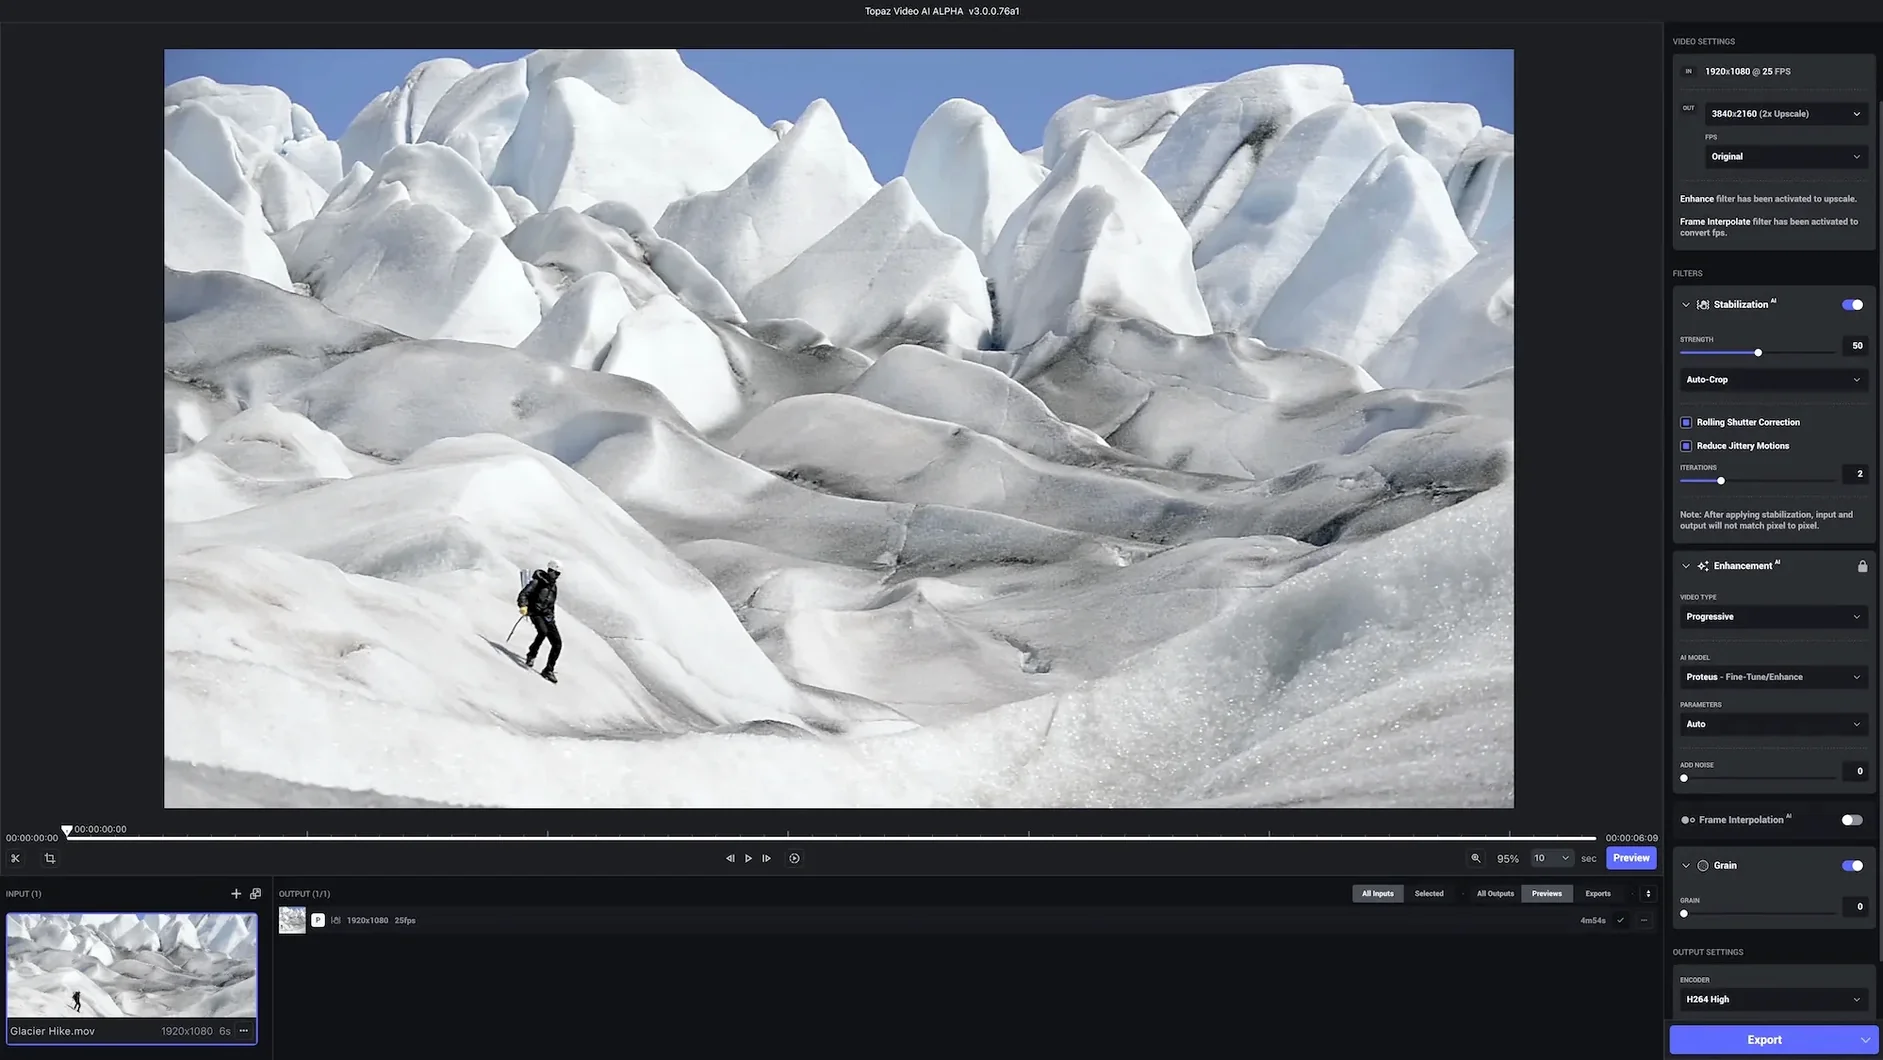
If you've used Topaz Gigapixel for stills, the video sibling will feel familiar. Topaz Video AI takes that same AI-driven enlargement thinking and applies it frame by frame. It's the tool formerly called Video Enhance AI, and the job hasn't changed: take noisy, soft, or low-resolution footage and give it a serious quality lift with just a few choices and a render.
What I'd use it for: rescuing old DV tapes and grainy phone clips that need to sit comfortably in a 4K timeline. The app is built for upscaling SD to HD and HD right up to 8K, pulling out detail while it tames compression artifacts and sensor noise. There's also a focus-restoration path for shots where the autofocus wandered off mid-take.
Under the hood, it runs natively on Apple Silicon and Intel 64-bit Macs, and the interface stays in English. The workflow really is straightforward—import a clip, pick an AI model and output size, preview a short section, then let it process. No timeline fiddling, no node trees. That simplicity is the point.
Version 1.7.1 is a quiet release with no big feature bulletins, just a continuation of the steady refinement Topaz Labs has been doing since the rebrand. If you're on macOS 11 or newer, the current build keeps pace with recent Mac hardware without changing what already worked.
A denoise-and-upscale walkthrough for an old DVD rip
Here's a real-world path I'd follow with a grainy MPEG-2 clip from a burned DVD. The source is 720×480, interlaced, soft in the wide shots and noisy in the shadows. The goal: clean 1080p that doesn't look like a watercolor painting.
- Drop the clip into the app. The preview panel shows the first frame — usually not the best test frame, so scrub to something with both motion and a dark corner.
- Set Output Resolution to 1920×1080, square pixels. The app will handle the aspect ratio conversion from anamorphic on its own.
- Pick the Proteus model. It's the one designed for badly compressed sources, and it balances noise removal with detail retention better than Artemis for this kind of footage.
- Under model parameters, push Revert Compression to about 40 and Reduce Noise to 35. Leave sharpen around 20 for now — you can nudge it later after seeing a preview.
- Open the Frame Interpolation section and set it to Chronos Fast with a target of 30 fps progressive. The original is 29.97 interlaced; this deinterlaces cleanly and keeps motion smooth without inventing too many new frames.
- Render a 10-second preview at full resolution. Watch the shadow areas and any fast lateral movement for smearing. If faces go waxy, back off the noise reduction by 10 points.
- Once it looks right, hit export to ProRes 422 HQ. I'd avoid H.264 as an intermediate — you've done all this work to keep detail, so don't hand it to a lossy encoder just yet.
That entire process takes about five minutes of decisions and then however long the render needs. The rest is just waiting.
Preview quality is set too low by default
Out of the box, Topaz Video AI makes reasonable guesses, but a few defaults lean conservative. Here's what I'd adjust straight away.
- Preview quality. The default preview resolution is often a quarter of the output. Crank it to Full before you judge sharpening. Half-res previews hide the halos you'll see later.
- AI Processor. If you're on Apple Silicon, make sure it's set to use the Neural Engine, not just the GPU. The difference in render time on an M1 or M2 is noticeable — sometimes 30% faster, depending on the model.
- Output container. The app defaults to MP4. For anything destined for an NLE, switch to MOV with ProRes as the codec. You'll get less generational loss when you cut and grade later.
- Add grain back. After heavy denoising, video can look plasticky. There's a grain slider tucked in the post-processing section. A value of 3–5 keeps a filmic texture without undoing the cleanup work.
- Suffix for output files. In preferences, set the output filename suffix to something short like "-enhanced" so your Finder doesn't become a guessing game. The default adds a long model name and resolution string.
Feed it straight into Resolve or Final Cut
Topaz Video AI doesn't try to be an editor or a compositor, and that's good. It's a preprocessing and restoration station that feeds into whatever you actually cut in.
The most natural pairing is with DaVinci Resolve or Final Cut Pro. I'd run a clip through Topaz before it hits the timeline, not as a plug-in inside the NLE. The rendered ProRes file becomes your new master clip. That keeps the edit smooth — no heavy AI processing happening in real time while you're trying to scrub.
For archival projects, the app plays nicely with macOS Quick Actions too. You can set up a watched folder where exported TIFF sequences from old film scans land, and batch them in from the Finder. Topaz will read image sequences as a clip if you import the first frame. The frame interpolation models can then smooth the playback to a standard frame rate without the stuttery look of simple frame blending.
There's also a quiet synergy with HandBrake on the other side of the workflow. If your source is an obscure codec that Topaz won't read, transcode to ProRes in HandBrake first, then feed that clean master into Topaz. The extra step is worth it when the alternative is a failed import.
Crashes calmed down after the 1.6 era
Version 1.7.1 is a maintenance release — no new models, no interface redesign. What changed in everyday use from the 1.6 era is mostly under the hood: better memory handling on Apple Silicon, fewer mysterious crashes when the queue gets long, and quicker model switching when you flip between Proteus and Nyx.
The app used to get sluggish after three or four preview renders without closing the preview window. That's mostly gone now. On an M2 MacBook Air, I can cycle through model comparisons for twenty minutes without the fans spinning up and without the UI starting to stutter. On Intel machines, the render times haven't changed dramatically since 1.6, but the progress bar estimates are more honest — fewer "two minutes remaining" situations that last fifteen.
The patch process for installation is worth noting if you're on macOS "Golden Gate" — the Patch.command script occasionally bounces with a permissions error rather than running clean. The workaround is simple: open Terminal, drag the command file in, hit return, and type your password when prompted. It's the same action, just initiated manually.
Drag a folder to queue up batch processing
- Drag a folder, not just a file. You can drop a whole folder of clips onto the window and they'll queue up in sequence. Batch processing is otherwise hidden behind a small button in the file list.
- Command-R for recent files. There's no obvious "Open Recent" menu item, but the keyboard shortcut brings up your last few imports. Handy when you close the app and come back the next day.
- Right-click a preset to duplicate it. If you've dialed in settings for one clip type — say, VHS tapes with a specific noise pattern — duplicate the preset and rename it. Switching between custom presets is faster than remembering slider positions.
- Model comparison view. The split-screen preview has four quadrants you can assign to different models. It's hidden behind a small grid icon above the preview. Comparing Proteus, Artemis, Iris, and Nyx side-by-side on the same frame saves a lot of guesswork.
- Estimates in the queue panel. The estimated time per clip appears only after a few seconds of processing. Hover over the time to see the current frame rate in frames per second, which is more useful than a percentage bar for judging whether you have time for a coffee or a lunch break.
The app works well with topaz video ai for mac setups where the GPU does the heavy lifting, and it's common to see people on appstorrent topaz threads comparing render times across different hardware. On a Mac, the topaz video ai mac os experience is comfortable once you set the AI processor correctly — skipping that setting is the most frequent reason for slow renders. It's a different animal from older builds like topaz video v1.0.5, where model downloads had to be managed manually and the preview window was far less responsive. Finding topaz video 7 crack discussions online usually leads back to the same advice: keep the app updated, feed it clean source files, and let the preview guide your settings rather than chasing "best" numbers from a forum.
- macOS 11 or newer
- Apple Silicon or Intel 64-bit Mac
- Interface language: English
Questions from the stall
Can Topaz Video AI fix grainy or blurry old videos?
Yes, it's designed to remove noise and compression artifacts, restore soft focus, and upscale archival footage—even SD material—to HD or 4K.
Notes from other shops 0
Sign in or open a shop account to leave a note.
No notes yet. If you've used this on a shop Mac, tell me how it went.