Version 2.6.1 is a small housekeeping update — it fixes a snag where the plug-in wouldn't recognize an existing authorization for some folks who updated from 2.5.0. No new knobs, no new sounds, just a smoother handshake when you open the session.
| What it is | How it fits |
|---|---|
| Vocal processing plug-in | Insert on a vocal track or a parallel bus |
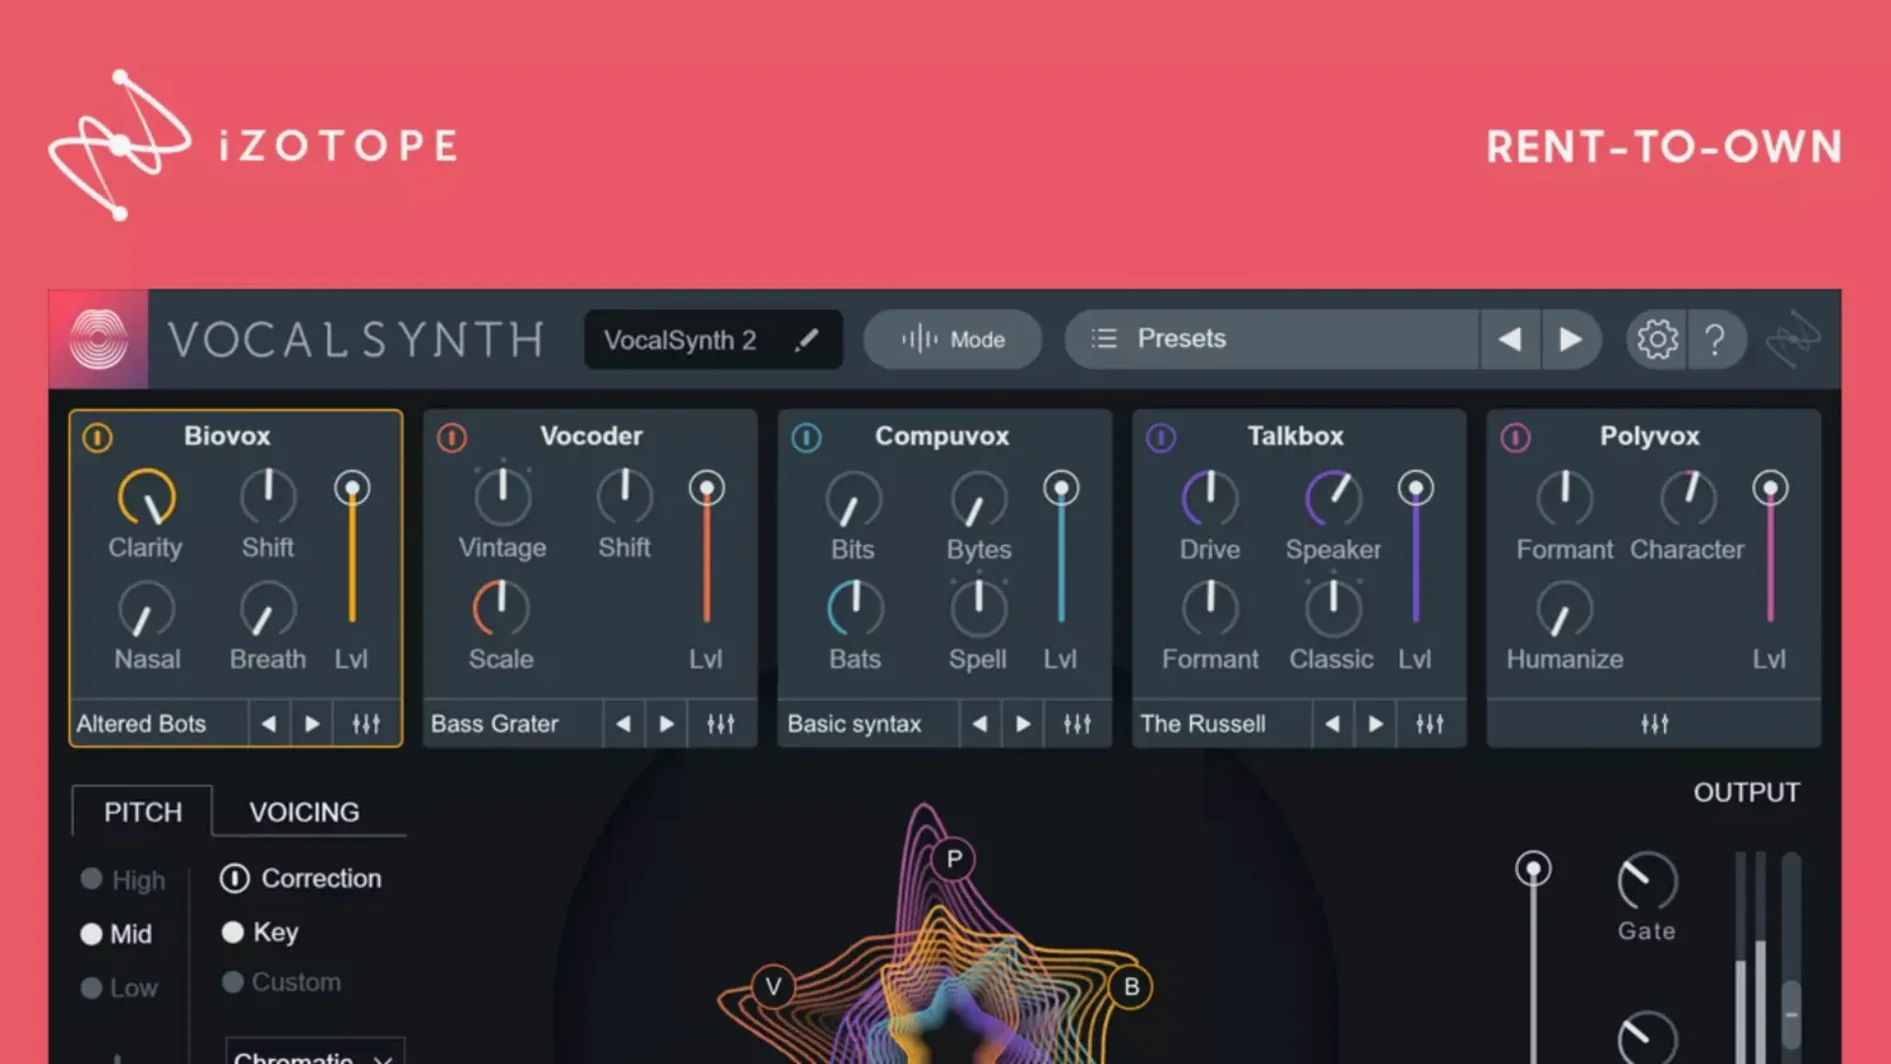
| 5 mixable modules | Blend Biovox, Vocoder, Compuvox, Talkbox, Polyvox |
| 3 processing modes | Auto, MIDI-triggered, or sidechain-driven |
I'd reach for it when a lead vocal needs an edge that EQ alone won't deliver. Drop it on a track, pick a mode — Auto reads the performance and follows along, MIDI lets you play harmonies from a keyboard, and Sidechain feeds it another track as the carrier. The five modules stack like stompboxes, so you can dirty up a chorus with Compuvox, then pull back to a subtle Biovox layer for the verse. It also talks to Neutron, Ozone, and Tonal Balance Control, so the tonal footprint stays visible across the whole mix.
First settings I'd change
Out of the box, VocalSynth 2 loads with the Biovox module active and everything else bypassed — a safe starting point, but not the most revealing one. Before I do anything creative, I flip open the preferences and make three small adjustments that save me grief later.
- Turn off auto-gain compensation while dialing in. The plug-in tries to keep perceived loudness steady as you blend modules, which is thoughtful, but it masks how much each layer actually contributes. I switch it off during sound design, then toggle it back on once the blend feels right.
- Set the MIDI mode response curve. If I plan to play harmonies from a keyboard, I drop the pitch quantization from chromatic to the key of the song. Less chasing wrong notes, more time making music.
- Rename the wet/dry routing for the session. I almost never run VocalSynth 2 100% wet on an insert. A quick trip to the routing panel lets me set up a parallel path right in the plug-in, so the dry vocal stays intact and the synthesized layers sit underneath — like having a wet fader without extra bussing.
Overcooking a chorus with a hushed octave layer
Say I've got a verse vocal that's sitting right but feeling too polite for the bridge. The performance is good — warm delivery, nice timing — but the arrangement swells there and the lead needs to swell with it. Here's how the next twenty minutes usually go.
I insert VocalSynth 2 on a duplicate of the vocal track rather than the original. That way the clean take stays put, and I can print or blend the processed version without second-guessing.
I start with the Polyvox module. Dial the mix to about 40%, set the shift to an octave up and a fifth, then narrow the stereo spread so the doubles don't wander too wide. The key is keeping the pitch-shifted voices tucked behind the dry signal — they're texture, not a feature.
Next I slide over to Compuvox. Bit-crushing alone sounds like a broken guitar pedal, so I pull the crush depth down to 15%, boost the high-pass filter to around 300 Hz, and use the envelope follower to let only the louder syllables trigger the grit. That way the consonants stay intelligible and the held vowels get the treatment.
I map the module mix fader to an automation lane and ride it up through the bridge, then drop it back for the final chorus. Sixteen bars of controlled chaos, and the dry vocal underneath keeps everything grounded. I bounce the processed track in place, group it with the original, and move on.
Seeing Polyvox harmonics in Tonal Balance Control
VocalSynth 2 doesn't live in a bubble. The inter-plugin communication with Neutron and Ozone means I can pull up the Tonal Balance Control window and see exactly where the synthesized layers are piling up energy. If the Polyvox octave-up voices are crowding the hi-hat range, I notch them with Neutron's dynamic EQ instead of guessing.
It also pairs well with stock macOS tools. I'll often capture a quick vocal idea in Voice Memos, AirDrop it to the Mac, drop the file into my DAW, and throw VocalSynth 2 on as a scratch processing chain. The Auto mode follows the pitch without any setup — no MIDI routing, no sidechain patching — so I can hear whether an idea has legs before committing to a full tracking session.
For sound design mornings, I route a software instrument track into VocalSynth 2's sidechain input. A simple sine wave from a stock synth becomes the carrier; my voice becomes the modulator. The Vocoder module with the sidechain mode active turns mumbled phrases into pitched, playable textures that sit somewhere between a talkbox and a pad. I'll sample the result, drag it into Logic's Quick Sampler, and suddenly I've got a custom instrument that started with two tracks and one plug-in.
- Fixed an authorization hiccup where the plug-in didn't see an existing license after updating from version 2.5.0.
- macOS (Intel and Apple Silicon supported)
- Interface language: English
Questions from the stall
Does VocalSynth 2 work on Apple Silicon Macs?
Yes. Native Apple Silicon support arrived in version 2.5.0, so it runs directly on M-series chips without Rosetta.
Can I control VocalSynth 2 with a MIDI keyboard?
Absolutely. Switch the processing mode to MIDI, and you can play harmonies or melodies that shape the vocal in real time.
What iZotope plug-ins does VocalSynth 2 connect with?
It integrates with Neutron, Ozone, and Tonal Balance Control for inter‑plug‑in communication across your session.
Notes from other shops 0
Sign in or open a shop account to leave a note.
No notes yet. If you've used this on a shop Mac, tell me how it went.