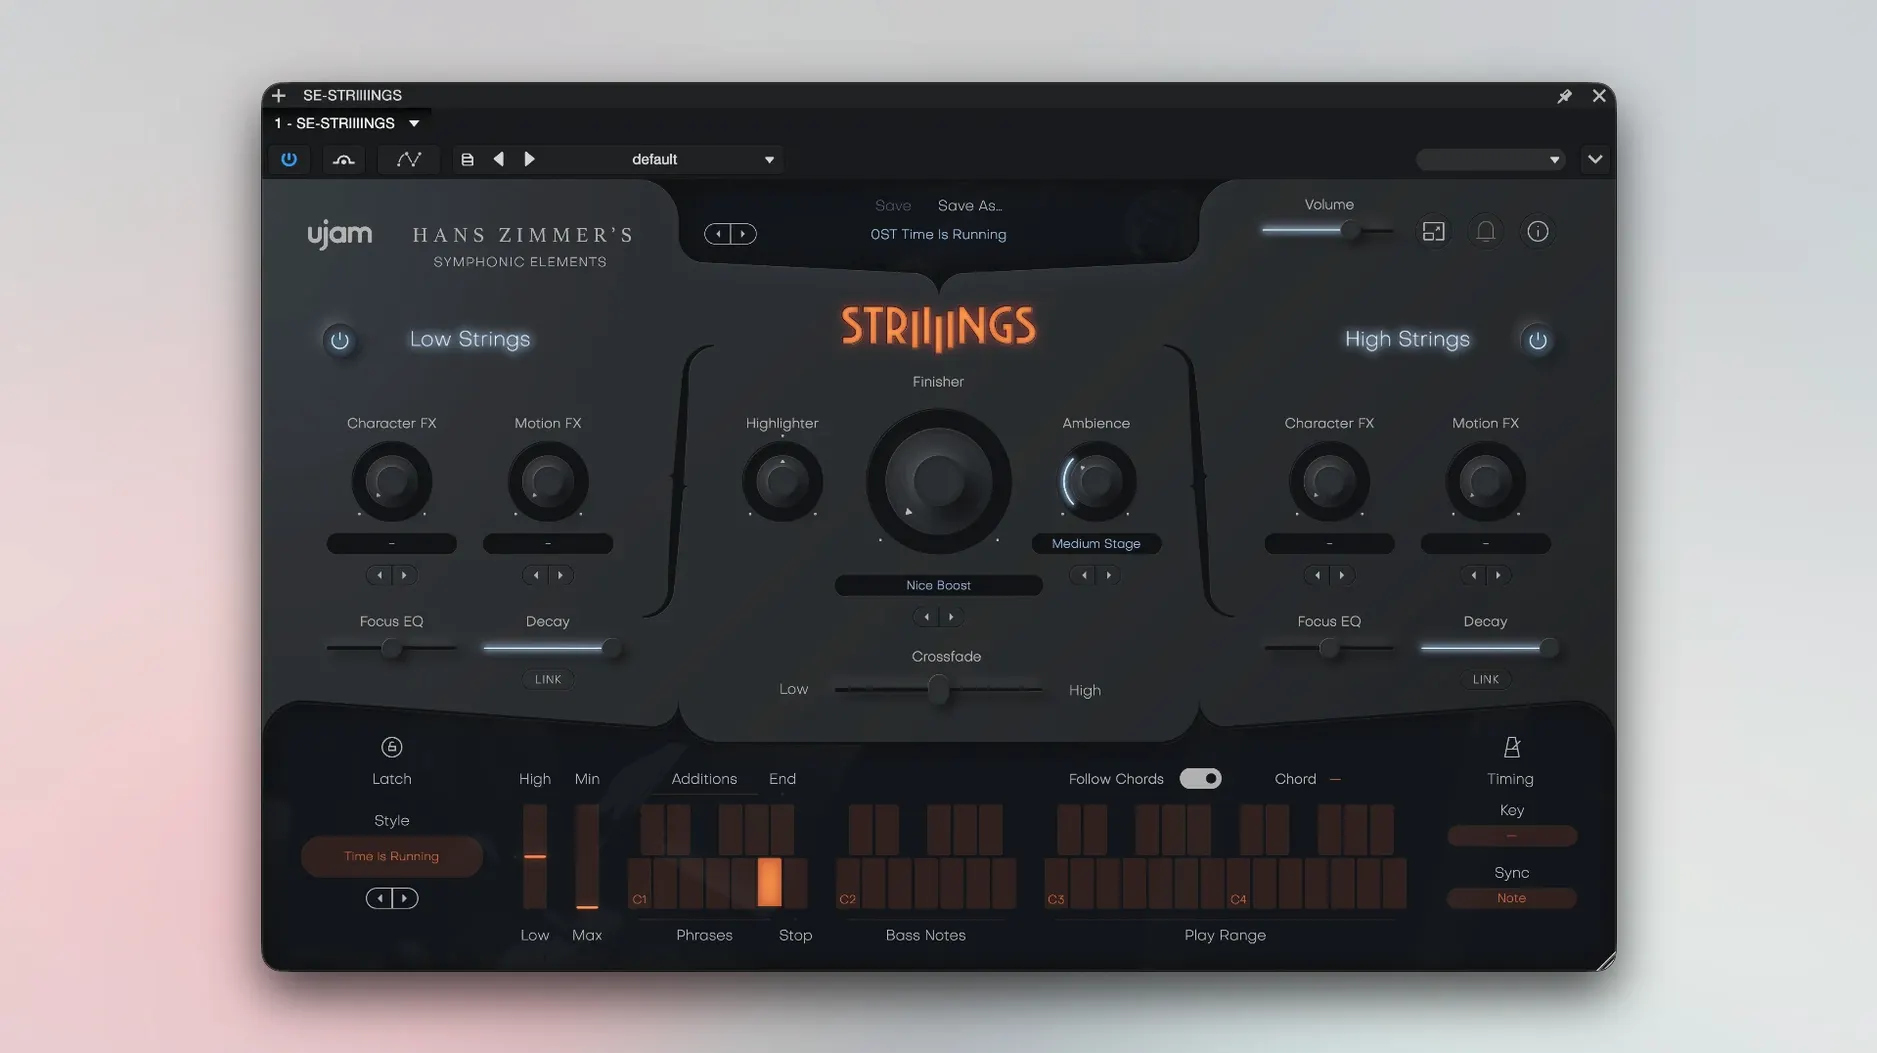
UJAM Symphonic Elements STRIIIINGS puts a modern cinematic string section at your fingertips, drawn from Hans Zimmer's personal recording library.
How does it split the orchestra?
The plug-in divides the ensemble into two independent layers: Low Strings and High Strings. Each layer has its own set of controls, so you can treat a brooding cello-and-bass bed very differently from the violin textures floating above it.
Faders that shape articulation, octave, and stereo placement per layer
Each layer gets dedicated faders for articulation style, octave shift, and spatial placement within the stereo field. A central sound-design section then applies filtering, envelope shaping, and a character control that pushes the tone from clean and close to processed and wide. The result is less about perfectly mimicking a concert hall and more about shaping a mix-ready texture that sits right where you need it.
Grainy bowed-ambient pads for electronic producers
Not at all. A sound designer or electronic producer can pull just as much from it. Dialing back the expression and driving the character control yields grainy, bowed-ambient pads that tuck neatly behind a beat, while a quick tweak of the High Strings articulation can produce short, percussive stabs for a hybrid cue.
Plug-in loads in under two seconds on Apple Silicon
STRIIIINGS loads fast. On an Apple Silicon Mac the plug-in appears in under two seconds, and preset browsing feels immediate — no disk-spinning pauses between patches. The samples stream from a compact library, so you are not staring at a progress bar while a 60 GB orchestra unpacks itself.
RAM use stays modest. With both layers active and a dense preset loaded, it typically sits around 600–800 MB in Logic or Ableton Live. That leaves headroom for a drum bus, a synth or two, and a handful of effects before the system even thinks about swapping. On Intel machines the numbers creep a little higher, but the plug-in still runs comfortably inside the 4 GB minimum the developer states.
Stability has been uneventful in the best way. Across Logic, Bitwig, and Reaper, version 1.3.1 has not caused a single project-ending crash during editing or playback. The plug-in recovers cleanly from a session reload, recalling automation lanes and fader positions without drift. One quirk worth knowing: the first launch after installation takes a few seconds longer while the authorization check runs. After that, opening it feels like any other instrument in the rack.
CPU load is reasonable for a texture instrument. A sustained chord with both sections active and crossfade motion sits around 8–12% on a recent M-series processor. Dense automation pushes that toward the high teens, but freezing the track solves it instantly. For an instrument built around long evolving notes rather than polyphonic legato, the performance profile fits daily production work without forcing constant track freezes.
Preset switching no longer drops audio
Version 1.3.1 refined the things that annoyed people quietly. Preset switching, which could hitch for a beat on older builds, now snaps over without an audio dropout. The plug-in also handles sample-rate changes more gracefully — switching a session from 44.1 to 48 kHz no longer requires reloading the instrument from scratch.
Apple Silicon support arrived in a point release before 1.3.1, but this version tightened it. On ARM Macs the plug-in runs natively, not through Rosetta, and the difference shows in project load times and idle CPU draw. Intel support remains solid for older machines, and the installer bundles both architectures so you do not have to choose.
Under the hood, the authorization system smoothed out. Earlier versions occasionally required a second launch to confirm the license after installation. The current build still asks for that double-open on first use, but the process finishes faster and does not loop back if the DAW scans plug-ins in the background.
A single instance won’t play four-part harmony
The most common mistake is treating STRIIIINGS like a traditional string library and loading it onto a MIDI track expecting to play four-part harmony with one instance. It is not built for polyphonic section writing — each layer responds to monophonic input, so chords need to be split across multiple tracks or played as single lines. Stacking two or three instances on separate tracks gives you far more control over voicing anyway.
Another stumble: ignoring the articulation fader. New users often land on a preset, play a few notes, and decide the patch feels sluggish or too sharp, then move on. The articulation control reshapes the attack and release envelope in real time, so a short-spiccato preset can soften into a swelling pad with one slider. It is the quickest way to make a preset fit the cue instead of hunting through sixty styles.
Beginner mixes sometimes drown in the low-mid buildup. Low Strings covers basses and celli, and the character control can add significant body below 300 Hz. When both layers run wide open, the resulting texture fights with kick drums and bass synths. High-pass filtering the Low Strings layer — even gently, around 80–100 Hz — cleans up a mix without thinning the orchestral weight.
A subtler mistake is running the plug-in with the DAW transport stopped and wondering why the sound is static. Some presets respond to tempo-synced modulation, and the motion only kicks in during playback. Hitting play reveals the actual behavior of a patch.
A workflow for adding tension to a hybrid cue
Say you have a dark electronic cue running at 100 BPM — drums, a bass pulse, and a simple arpeggiated synth line. You want an undercurrent of string tension that builds toward the next section without crowding the mix.
Start by loading STRIIIINGS on a new instrument track. Pick a preset from the sound designer bank that already leans toward the unsettling — something with a slow attack and a narrow stereo field. In the Low Strings layer, pull the articulation fader down to about 30 percent so the celli and basses enter softly, almost behind the beat. Drop the octave shift by one to anchor the texture below the bass pulse.
Switch to the High Strings layer. Push the articulation higher, around 65 percent, so the violins speak a little sooner than the low end. Shift the octave up by one and widen the stereo placement to roughly 70 percent left and right. The goal is a thin, glassy layer hovering above the low rumble.
Now move to the central sound-design section. Dial the character control toward the processed side — not fully, just enough to shave off the concert-hall realism. Add a touch of filter movement with a slow LFO rate synced to the DAW tempo. The strings now breathe with the track, swelling and receding in quarter-note pulses.
Record a single sustained note that follows the chord changes of the cue. Do not play a complex line — one note per bar is plenty. Once recorded, open the crossfade automation lane and draw a slow ramp from Low Strings toward High Strings over eight bars. By the end of the phrase the texture has climbed from a subterranean rumble to an airy, nervous shimmer, and the transition into the next cue section happens without a single edit to the arrangement.
- macOS 10.14 or later
- Intel and Apple Silicon compatible
- 4 GB RAM
- 64-bit software host only
Notes from other shops 0
Sign in or open a shop account to leave a note.
No notes yet. If you've used this on a shop Mac, tell me how it went.