LightBurn is layout, editing, and laser control software rolled into one place for people running CO₂, diode, and fiber machines. Once you move past basic cutting, the details start to matter — how passes are ordered, how a bitmap gets dithered for engraving, or how a rotary attachment behaves during a job. This is where an experienced user's attention shifts.
Fine control over the cut itself
Every job can have its own power, speed, and pass count, and you can drag layers into a custom cut order so inner shapes finish before outer ones without a second thought. The material library stores tested settings, which turns a half-hour guess into a quick pick from a list. For engraving, brightness, contrast, and dithering controls let you pull clean results from a flat photo without pre-processing it somewhere else first.
Design and device tools that stay out of your way
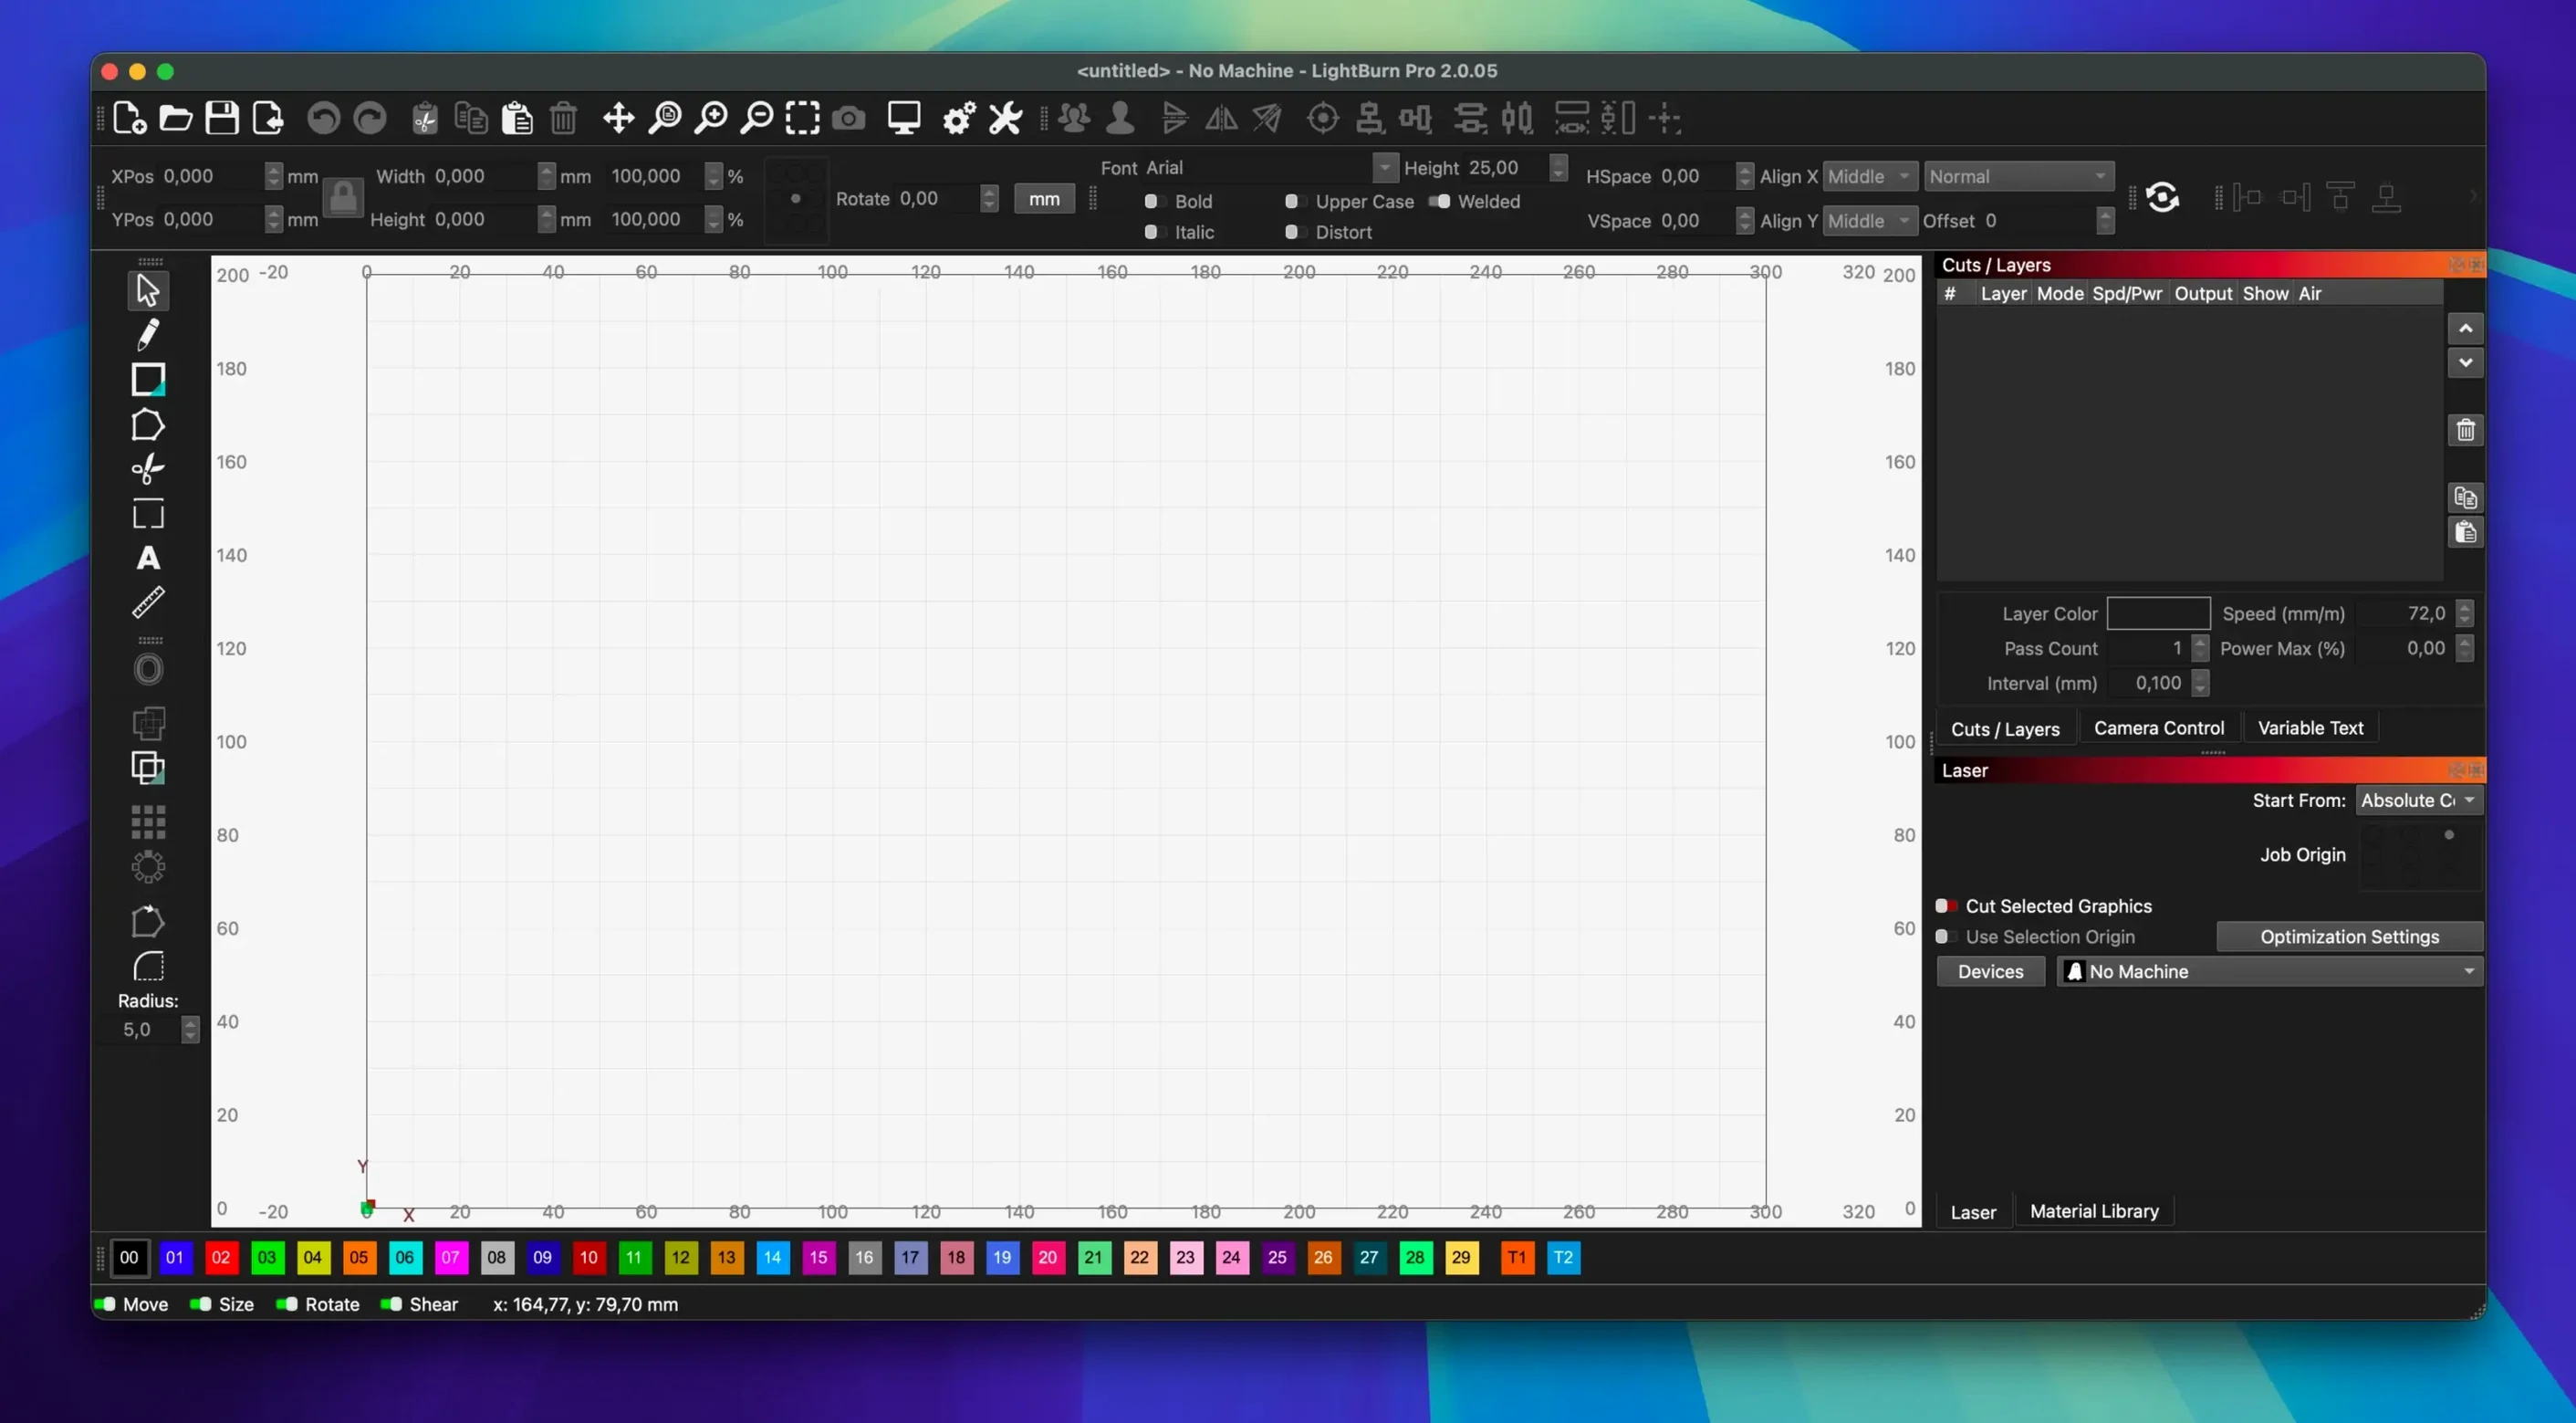
The built-in vector editor handles shape creation and Boolean cuts directly on the canvas, so you are not bouncing between two programs for a quick adjustment. Image work — vectorization, masking, edge enhancement — lives inside the same window. Rotary support and camera alignment are there when you need them, and the controls for jogging and offset management keep the relationship between your file and the machine head tight. It all runs without extra software talking to the controller, which means fewer links in the chain to check when something goes wrong.
Double-click a layer to skip the settings panel
Most people open LightBurn and head straight for the big tools — the editor, the cut settings, the start button. A handful of quieter features save as much time once they become habit.
Double-clicking a layer opens its settings instantly, no need to hunt through the cut panel. Holding Shift while dragging a shape constrains proportions; holding Alt duplicates it on the spot. The Preview window deserves more attention than it gets — it shows exactly how the laser head will travel, so you catch an unexpected rapid move before it burns a line across your material.
Right-clicking any color swatch in the palette offers "Select all of this color," which makes bulk layer adjustments trivial. And if you work with text, typing Ctrl+Enter commits it without clicking away. Little things, but they accumulate over a long session.
One feature tucked away in the Window menu: the ability to save your entire workspace layout, panels and all. If you switch between a laptop screen and an external monitor, you will appreciate not dragging panels back into place every time.
Dark Mode makes the laser path easier to see at night
The jump to version 2 brought Dark Mode, and on late-night runs in a dim workshop that alone makes a difference. The interface feels calmer and the laser path shows up with better contrast against the darker background. The new Edit Nodes toolbar puts point-editing tools up front, so reshaping a curve no longer means fishing through menus. Extra shape creation tools landed too — fewer trips to external software for common geometric cuts.
Camera calibration got reworked, and anyone using a camera for registration will notice the alignment process is smoother. One practical effect: setting up a new material jig with camera overlay takes fewer test burns to dial in.
Version 2.0.05 itself is a maintenance release. It fixed an oddity where the window title bar would drift if stored offsets were wrong, corrected rotary jogging direction in CCW mode, and patched a crash that some SVG files triggered when they contained ungrouped DEF shapes. Nothing flashy, but if your rotary ever jogged the wrong way mid-job, you will notice the fix immediately.
Build your own material library before the first cut
After dragging the DMG into Applications and launching, resist the urge to cut something complex right away. Spend twenty minutes on these steps first:
- Set up your material library properly. The defaults are a starting point, not your settings. Cut a small test grid on your usual plywood or acrylic, note the results, and save them as named entries. A month from now you will not remember which speed worked on that particular batch of 3mm birch.
- Check your controller connection before importing a project. LightBurn talks directly to the hardware, so confirm it sees your laser in the Laser window. On Apple Silicon Macs, Rosetta must be in place — the app runs as Intel 64-bit and the system handles the translation quietly, but without Rosetta it simply will not open.
- Run a small test rectangle at low power. This verifies both communication and framing. A rectangle the size of a business card tells you everything: origin position, travel behavior, and whether your workspace boundaries match reality.
- Assign a keyboard shortcut to "Frame." Framing traces the job boundary without firing the laser, and the faster you can trigger it, the less likely you are to skip it and ruin a sheet of material.
Your origin won't fire where you aimed
Every laser user runs into a few predictable headaches. Here are the ones that show up most often and what actually fixes them.
The laser moves but does not fire
Nine times out of ten, the power setting for that layer is too low — not zero, just below the tube's firing threshold. Check your layer's max power, then test at 10% increments. If the controller shows a connection but no output, verify the enable signal; some DSP controllers need a specific pin state that LightBurn can toggle in device settings.
Rotary engraving comes out mirrored or stretched
The 2.0.05 release fixed jogging direction in CCW mode, but stretch is usually a steps-per-rotation setting. Measure your rotary's roller diameter precisely — even a millimeter off compounds over a full rotation. LightBurn's rotary setup dialog has a test button that moves the axis a fixed distance; use it with a piece of tape as a marker on the workpiece.
Imported SVG looks wrong or crashes
The patch for ungrouped DEF shapes in 2.0.05 covers one crash scenario, but SVG files from some older design tools can still misbehave. If an import looks incomplete, open the SVG in a text editor and check for nested clipping paths. Ungrouping everything in your source program before saving often prevents the issue. As a fallback, exporting as DXF from the original application gives LightBurn cleaner geometry to work with.
Framing runs off the edge of the material
This usually means the job origin and the machine origin drifted apart. Re-check "Start From" in the Laser window — "Absolute Coords" and "User Origin" behave differently, and switching between them without noticing is surprisingly common. If you use a camera, recalibrate after moving the machine or changing the lens focus; a millimeter of camera shift translates to a visible offset on the bed.
People occasionally hunt for a lightburn software torrent or a lightburn mac crack to test the software before committing, and the official DMG from LightBurn Software installs cleanly with the full feature set — no stripped-down trial that hides the rotary controls or camera tools behind a paywall. If you are searching for a lightburn torrent or lightburn mac torrent, check that you're grabbing a build that includes the 2.0.05 fixes so everything runs smoothly. A lightburn mac full download from the developer's site takes under a minute and gives you exactly the version this article describes, with the rotary fix and SVG crash patch in place.
Version 2.0.05 tidies up a few things that matter during production work:
- Fixed window title bar placement when stored offsets were off — no more hunting for a misaligned window.
- Rotary jogging direction now respects CCW mode properly.
- Squashed a crash when importing SVG files with ungrouped DEF shapes.
- macOS 10.13 or later
- Intel 64-bit processor
- Rosetta required on Apple Silicon Macs
Notes from other shops 0
Sign in or open a shop account to leave a note.
No notes yet. If you've used this on a shop Mac, tell me how it went.