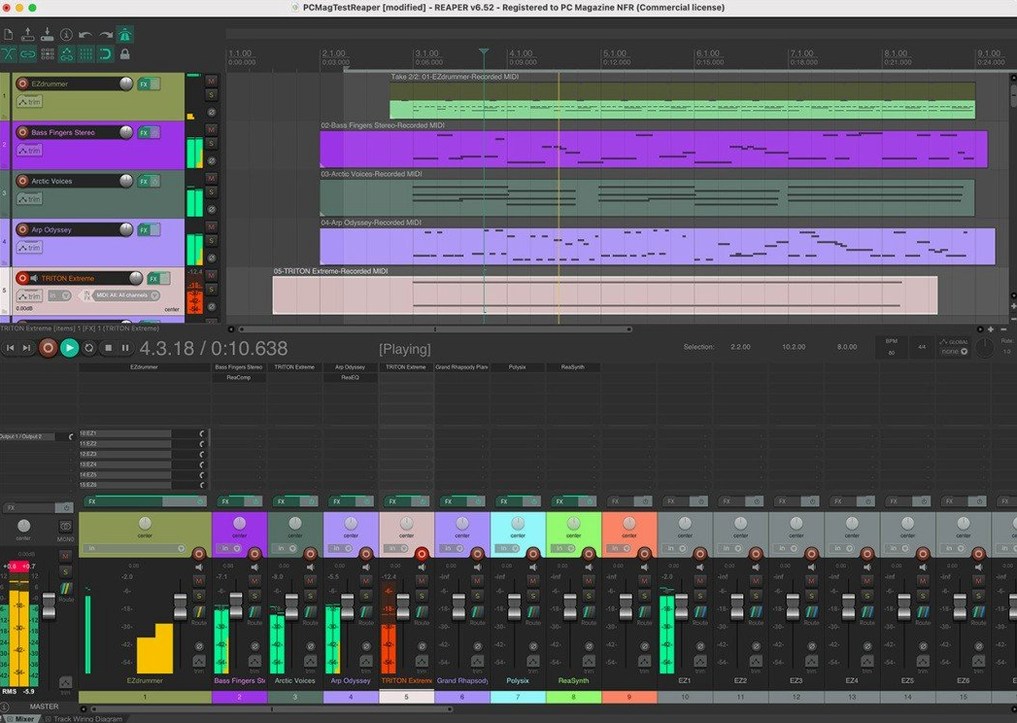
Turning a Mac into a recording rig shouldn’t mean wrestling with arbitrary track limits or locked-down workflows. REAPER gives you a complete digital audio workstation that puts the full toolset in your hands — recording, editing, mixing, MIDI composition, and mastering — without boxing you into a single way of working.
Will REAPER run on my Mac?
It runs on macOS 10.15 and later, including macOS 26.x. Both Intel and Apple Silicon (ARM64) Macs are supported natively, so you won’t be stuck translating through Rosetta unless you choose the Intel build on an M-series machine.
What do I actually get?
A recording studio, basically. REAPER handles up to 512 channels of audio I/O and 128 MIDI hardware outputs. There aren’t separate track types for instruments, buses, or aux sends — every track can do anything, which keeps projects flexible as they grow.
Can I shape it around my hardware?
Yes, and that’s where it shines for a small shop or home studio. It works with a huge range of audio interfaces, plugins, and digital formats. You can remap channels, script new actions, and tweak the interface until it fits the gear you already own.
What’s the catch?
There isn’t really one. You can evaluate the full, uncrippled application for 60 days. No locked features, no track count caps — just the whole DAW while you decide if it earns a spot in your workflow.
Pick your interface before recording a note
Out of the box, REAPER works, but a few quick tweaks make it feel like your own. Head into Preferences and hit these changes before you lay down a single track.
- Audio > Device — select your audio interface and set the sample rate. If you're on an M-series Mac, the native driver usually works with lower latency than the default system audio. Tick "Request sample rate" so REAPER doesn't change it on you mid-session.
- Appearance > Track Control Panels — turn on "Show dB scales on meters" and bump the meter update frequency. You'll spot clipping faster, and the meters feel more responsive when you're riding a vocal level.
- Mouse Modifiers — set your right-click drag to marquee-select items, and assign a modifier key for splitting under the cursor. It sounds small, but editing speed doubles once your muscle memory kicks in.
- Project > Media Item Defaults — enable "Create automatic fade-in/fade-out on new items" and set the length to something tiny like 2 ms. You'll never hear a click at an edit point again, and you can always adjust it later.
- Backups — under Project, turn on "Save to timestamped file in project directory" and set the interval to every 5 minutes. It's saved plenty of people from losing an afternoon's work when a plugin misbehaves.
Those five changes take under two minutes and give you a session that reacts like you expect it to.
From guitar idea to comped vocals in 30 minutes
Imagine it's 9 AM. You've got a guitar idea from last night and a client vocal track that needs comping. Here's how half an hour in REAPER actually unfolds.
1. New project, saved before you touch anything. You hit Cmd+N, then immediately Cmd+S and name the folder. REAPER creates the project file and a subfolder for audio — no scattered files on the desktop. You set the tempo to 118 bpm because the voice memo had that shuffle feel.
2. Track setup in seconds. You double-click the empty track area. Four tracks appear: one for a drum loop, one for the DI guitar, one for a mic'd amp, and one to receive the client's vocal stems. You drag the vocal folder straight from Finder onto track 4 — REAPER reads the timestamps and places everything in position without asking a single question.
3. Quick routing. You drop a reverb plugin on a new track, click the folder icon on it, and drag the vocal track underneath. Now the vocal feeds the reverb bus. You balance the dry signal and the send with the track faders. It's not a separate bus type — it's just a track behaving differently because you told it to.
4. Comping the vocal. You enable "Takes" on the vocal track, split the three takes into phrases with S, and click to audition each slice. The active take highlights, and you build a composite performance by selecting the best bits. No swipe-comping tool required — just clicks and splits.
5. A fast guitar overdub. You arm track 3, hit R, and play along. The metronome counts you in with a two-bar pre-roll. You punch in a sloppy section by setting a time selection and hitting record — REAPER only writes audio inside the bounds, leaving the rest untouched.
6. Rough mix and export. You pull the drum track down 3 dB, nudge the guitar up, and slap a limiter on the master track. Cmd+Option+R opens the render dialog. You pick MP3, stereo, 320 kbps, and drag the rendered file into an email for the client. Whole session: twenty-eight minutes.
Logic gives you instruments, REAPER gives you routing
If you're coming from another DAW, the differences show up fast. Here's how REAPER sits next to three common alternatives.
Logic Pro. Logic gives you a massive instrument and loop library from the jump. If you compose with built-in synths and Apple Loops, it's hard to beat. REAPER ships with a leaner set of stock plugins but doesn't lock you into Apple's ecosystem. Where Logic expects you to work inside its track-type system — audio, MIDI, Drummer, aux — REAPER treats every track the same, which some people find liberating and others find disorienting at first. Folder tracks in REAPER effectively serve as busses and VCAs, but you build them yourself instead of having them pre-labeled. CPU efficiency on REAPER is famously good; projects that choke Logic on the same Mac often run smoothly here.
Ableton Live. Live is built around clip launching and real-time performance. If you trigger loops on stage or sketch songs in Session View, REAPER won't replicate that workflow natively — it's a linear timeline DAW. For multitrack recording, mixing, and editing, though, REAPER pulls ahead with deeper routing, faster editing shortcuts, and far more customizable track layouts. Live's warping engine is excellent for tempo-matching audio, but REAPER's stretch markers and dynamic split give you surgical control that Live's warping doesn't match.
Pro Tools. Pro Tools exists in professional post-production studios for a reason — AAF/OMF interchange, clip-based gain, and decades of industry expectation. REAPER does not chase Pro Tools on AAF import reliability or Dolby Atmos workflows. What it does offer is unlimited tracks in the base application and no iLok dependency. If you're not handing sessions back and forth to a Pro Tools house, the functional gap narrows substantially, and REAPER's scripting API lets you automate tasks that would require manual labor in Pro Tools.
Remote guest tracks meet a Focusrite in Portland
Mira edits a weekly interview podcast from her apartment in Portland. She records remotely — her guest tracks arrive as separate WAV files, and she records her own voice and a local co-host into a small Focusrite interface.
She sets up a project template with three folder tracks: one for her voice, one for the co-host, and one for the guest, each containing an EQ, a compressor, and a de-esser chain already dialed in. When a new episode folder drops, she imports the guest WAV, drags her own recorded stems into place, and starts trimming. She uses REAPER's ripple-editing mode so that when she cuts a pause or a false start, everything downstream
- macOS 10.15 or later (including macOS 26.x)
- Intel or Apple Silicon Mac
Questions from the stall
What does REAPER actually do?
It’s a digital audio production application that records, edits, mixes, and masters audio and MIDI. Connect a microphone and audio interface, and your Mac becomes a full recording studio.
Notes from other shops 0
Sign in or open a shop account to leave a note.
No notes yet. If you've used this on a shop Mac, tell me how it went.