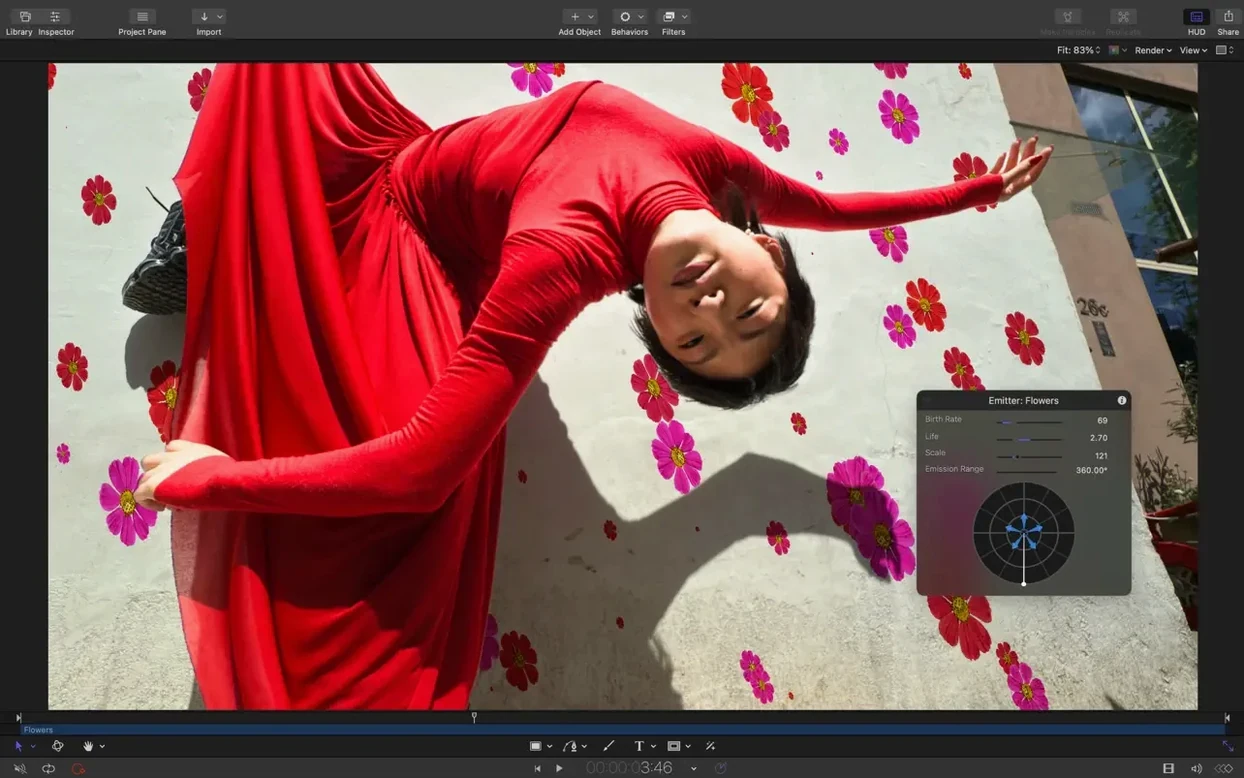
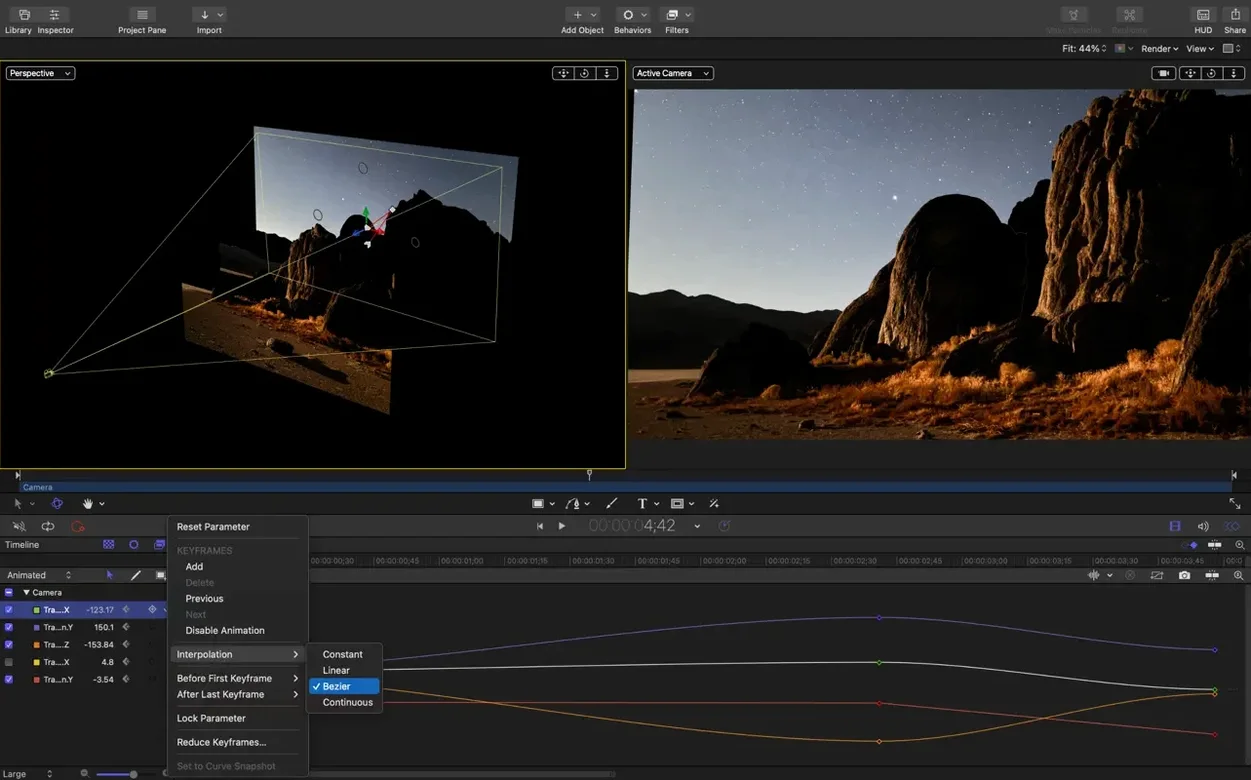
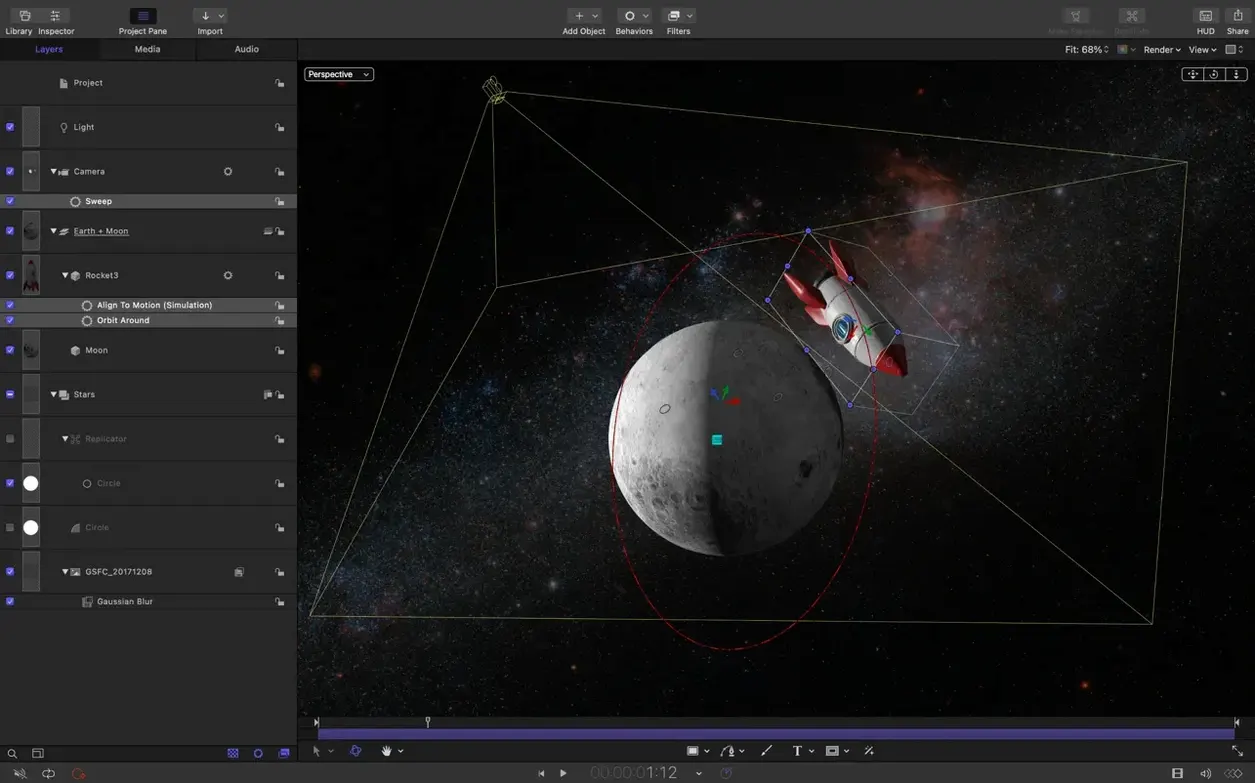
Motion is the motion graphics sidekick for Final Cut Pro editors, indie filmmakers, and anyone who builds their own titles, transitions, or abstract visuals for presentations and artistic work. The 6.3 update doesn't reinvent the wheel, but it quietly fixes a handful of rough spots that slowed people down and adds a couple of genuinely useful creative tools.
- SVG import that holds up — bring in vector art that stays sharp no matter how far you scale it, perfect for logo animations and title builds.
- Clip timing controls — stagger, cascade, or reverse clips right from the timeline, which saves a lot of manual nudging when you're building rhythmic sequences.
- Bezier Mask fix — dragging to select vertices on a Bezier Mask now works as expected, a small fix that makes a big difference in daily masking work.
- Color correction consistency — some color filters were rendering too bright on macOS 26; that's been reined in, so what you see matches earlier work.
- Texture and playback fixes — incorrect texture media on certain 3D text and particle emitters during playback is resolved, along with general performance improvements.
If you're already deep into the Apple ecosystem, Motion stays tightly woven with Final Cut Pro and Compressor. This release feels less like a feature drop and more like a maintenance pass that respects working professionals who just need things to behave.
A short film title sequence — how a solo filmmaker used it
A documentary maker I know had a tight deadline for a festival submission. She needed a 15-second title sequence that mixed archival photos, a hand-drawn logo her illustrator friend sent as an SVG, and some floating dust particles to echo the film's old-photograph mood. She built the whole thing in Motion in an afternoon.
She imported the SVG straight into a 3D group, scaled it 400%, and it stayed pin-sharp — no pixelation, no re-exporting from Illustrator at a higher resolution. She staggered the photo reveals using the new cascade controls, dropping each image a few frames after the last, then reversed two of them to create a subtle back-and-forth rhythm. The particle emitter, set to a low birth rate with a gentle wind behavior, added just enough atmosphere without distracting. By evening she had a sequence that looked like it took a small team a week.
What made it work wasn't any single feature — it was that she never had to leave Motion. No round-tripping to a vector editor, no manual keyframe nudging for the photo timing, no rendering out a test just to check if the dust particles would glitch. When you're one person wearing five hats, that kind of friction-free afternoon matters more than a flashy new effect.
Animating SVGs as native vector objects
The release notes are short, but a few things shift how the app feels in practice. SVG import is the headliner — and it's not just about sharpness. Motion treats imported SVGs as native vector objects, so you can animate individual paths, change fill and stroke colors over time, and even convert them to shapes for further manipulation. For anyone who's ever built a lower-third from scratch, that cuts out a lot of prep work.
The stagger, cascade, and reverse controls are deceptively simple. In earlier versions, creating a staggered sequence meant selecting clips one by one and dragging them on the timeline, or building a custom behavior. Now you select a group of clips, pick a direction and offset, and it's done. Cascade layers them with increasing delay from the first clip; reverse flips the order. It's the kind of thing you don't realize you needed until you use it twice and then reach for it on every project.
The Bezier Mask fix is less glamorous but arguably more important for daily users. Previously, dragging a selection marquee around multiple vertices on a Bezier Mask often missed points or selected the wrong ones. If you do a lot of rotoscoping or animated mattes, that bug probably cost you real time. It's fixed now, and mask editing feels responsive again.
Color correction filters that rendered too bright on macOS 26 — that one was tricky because it wasn't obvious in isolation. You'd only notice when comparing a render to an older project or moving work between machines. The fix restores consistency, which is the bare minimum but also a relief if you were pulling your hair out over unexpected brightness shifts.
Fix missing elements in complex SVG imports
A few things still trip people up, especially if they're coming from other motion graphics tools or upgrading from a much older version.
SVG files with complex clipping paths or embedded raster images sometimes import with missing elements. The workaround is to simplify the file in a vector editor first — expand strokes, flatten transparency, and remove any raster content before saving. Motion handles clean vector data beautifully; it stumbles on hybrid files.
Performance hiccups with large particle emitters still happen, even with the update's performance improvements. If playback stutters, drop the emitter's particle count temporarily while you design the look, then bump it back up before the final render. Also, check that "Show Full View" isn't on — it's a quick toggle that eats resources when you don't need it.
Behaviors stacking unexpectedly when you cascade clips. The cascade control offsets clip start times, but if a clip already has a behavior applied that references absolute time or a specific frame range, you might get overlaps or gaps. The fix is to apply behaviors after setting up the cascade, so they inherit the adjusted timing.
Color correction filters looking different on an external monitor — this isn't new to 6.3, but it's worth remembering. Motion uses the Mac's display color profile for the canvas, so if your external monitor has a different profile than your built-in display, what you see won't match. Set both to the same profile, or use a reference monitor with Final Cut Pro's broadcast mode for critical color work.
Set your default project duration and frame rate
A few minutes of housekeeping after a fresh install makes the next weeks smoother. Here's what I'd do.
Set your default project duration and frame rate to match what you actually deliver. Motion defaults to 10 seconds at 29.97 fps. If you work in 24 fps for film projects or 25 fps for PAL territories, changing this once saves a dozen little corrections later. Go to Motion > Settings > Project and set your preferred defaults.
Point Motion to your Final Cut Pro effects folders. If you build templates — lower thirds, transitions, generators — you want them to show up in Final Cut without hunting. In Settings > General, confirm the "Publish to Final Cut Pro" path points to the right location. While you're there, check "Automatically publish templates" if you create a lot of them.
Build a small test project with the new features. Import an SVG, apply a cascade to a few shape layers, drop in a particle emitter with the default settings, and render a short clip. It takes ten minutes and surfaces any quirks before a real project is on the line. Pay attention to how the SVG layers appear in the Layers list — they often come in as groups that you'll want to ungroup or reorganize right away.
Customize the workspace. Motion's default layout puts the Library and Inspector on the right, which works for most things, but if you do a lot of keyframing, pull the Keyframe Editor up from the bottom and save the layout. The less you rearrange windows mid-project, the faster you work.
Check your media disk. Motion loves fast storage. If your media library lives on an external drive, make sure it's connected via Thunderbolt or USB-C with decent read speeds. Sluggish drives are the hidden culprit behind a lot of "Motion is slow" complaints.
A full workflow: building an animated lower third from an SVG
Here's a walkthrough for a common task — turning a supplied logo into a finished lower third that you can reuse across a video series. This assumes you've already installed Motion and have an SVG file from a designer.
1. Start a new project. Open Motion and choose Final Cut Title as the template type. Set the duration to 8 seconds and the frame rate to match your edit timeline — 24 fps in my case. Name it something useful like "ClientName_LowerThird."
2. Import and place the SVG. Drag the SVG file from Finder into the canvas. Motion imports it as a group with sublayers for each path. In the Layers list, expand the group and rename the sublayers if the designer's names are cryptic — "logo mark," "wordmark," "tagline," whatever makes sense later.
3. Set up the composition. Scale and position the group where you want it on screen — typically lower third, left-aligned or centered. If the lower third needs a background bar, add a rectangle shape, style it with a solid or gradient fill, and place it behind the logo group. Set the bar opacity to something that works with your footage — 70–80% is a safe starting point.
4. Animate the entrance. Select the background bar and the logo group. Use the new cascade controls to stagger their appearance — bar first, logo elements 10–15 frames later. Add a Fade In behavior to each group and adjust the duration to match the cascade timing. For a more dynamic entrance, add a slight scale-up or a Move In behavior from the left edge.
5. Add polish. Apply a subtle glow or drop shadow to the logo mark so it separates from the background bar. If the SVG had strokes, consider animating them with the Write On behavior — it traces the paths and looks especially nice on hand-drawn or calligraphic marks.
6. Check the exit. By default, a title fades out at the end. If you want elements to exit individually, apply Fade Out behaviors and offset them. The reverse cascade option works here too — stack the exit delays so the logo mark lingers a beat longer than the background.
7. Publish parameters. Open the Inspector, select the text and color wells you want to change per use, and click "Publish." This makes them editable directly in Final Cut Pro without opening Motion again. At minimum, publish the text strings and the bar color.
8. Test in Final Cut Pro. Save the project. Motion publishes it automatically if you set that preference earlier. Switch to Final Cut, find the title in the Titles browser under your custom category, and drop it on a timeline. Check that the published controls work, timing feels right over real footage, and the SVG looks crisp at your delivery resolution.
The whole thing takes about 20 minutes once you've done it a few times, and the template is yours forever — swap the SVG, change the text, adjust the colors, and it's ready for the next episode or client.
Version 6.3 mixes a couple of creative additions with a solid round of bug fixes:
- Import SVG files that scale to any size and keep graphics sharp at any resolution.
- New controls let you stagger, cascade, or reverse clips right on the timeline.
- Performance updates keep things running smoothly.
- Fixed an issue where dragging to select vertices on a Bezier Mask didn't work.
- Fixed incorrect texture media during playback for some 3D text and particle emitters.
- Fixed an issue where some color correction filters rendered brighter on macOS 26 than on earlier releases.
- macOS 15.6 or later
- Apple Silicon and Intel Macs
- Part of Apple Creator Studio; integrates with Final Cut Pro and Apple Compressor
Questions from the stall
Does Motion work with Final Cut Pro?
Yes, Motion integrates directly with Final Cut Pro so you can build custom titles, transitions, and effects and publish them straight into your FCP timeline.
Can I use Motion for something other than film work?
Absolutely. It's commonly used for presentations, artistic video loops, and any project that benefits from animated graphics and compositing.
Notes from other shops 0
Sign in or open a shop account to leave a note.
No notes yet. If you've used this on a shop Mac, tell me how it went.