
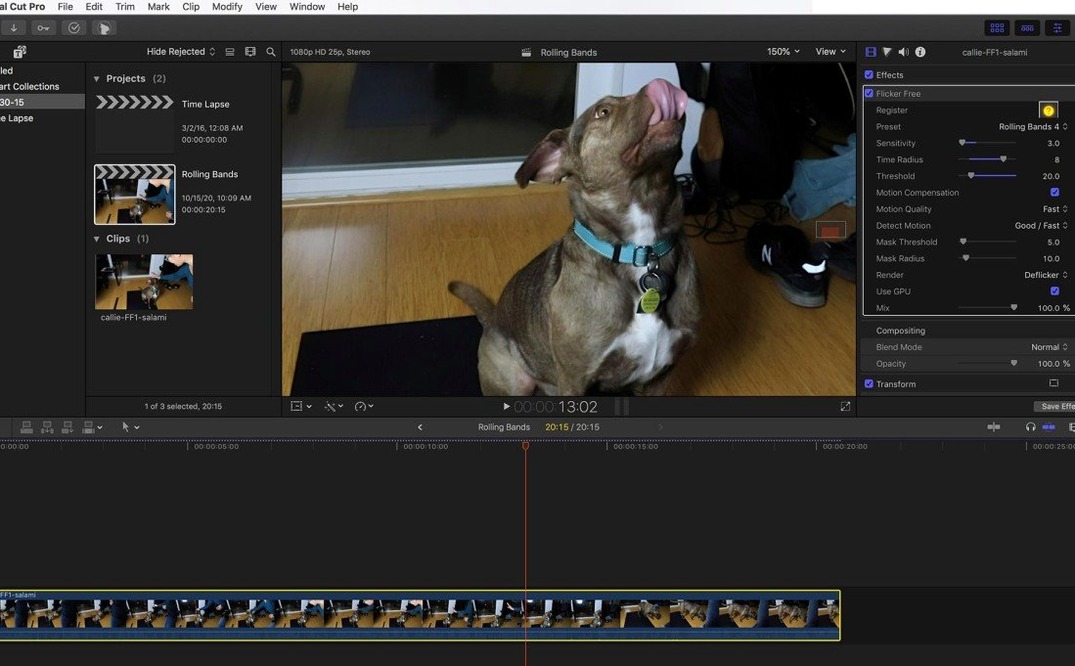
Flicker Free runs on any Mac that can host its compatible video editor, with native support for both Intel and Apple Silicon processors. It's not a standalone app—it slides into your host program as a third-party plugin, ready to tackle the kind of flicker that built-in tools usually miss.
Targeting specific flicker types
Where this plugin earns its keep is in how it handles distinct sources of trouble. It isolates rolling flicker from LED lamps and the scan-line strobing you get when filming computer monitors. You can dial in corrections for high-frame-rate footage without softening detail that should stay sharp. For time-lapse work, the engine analyzes luminance shifts across the whole sequence, smoothing out the rapid exposure jumps that ruin a sunset-to-night transition. Rather than one blunt adjustment, you get separate pathways for light-based flicker and the electronic sync issues from unsynchronized cameras.
Presets as a starting point, not a cage
The preset system isn't just a collection of one-click fixes. It's more like a fast-forward button to a sensible baseline. Once a preset gets you close, you can pull apart the processing to match tricky footage—tweaking how aggressively it tracks illumination changes or narrowing the detection to a problem area in the frame. For anyone working with mixed lighting on a single shoot, this means saving a tuned setup and applying it across a batch of clips without starting from scratch each time.
A wedding videographer's quick save
Think about a wedding editor with a first-dance clip shot under mixed venue lighting: warm tungsten overheads and harsh LED uplighting along the walls. The raw footage has a slow, ugly rolling band that drifts through every third frame. Built-in deflicker tools in the NLE make the whole image pulse softer and harder, which looks amateurish. With Flicker Free, she can pull up a preset tuned for LED rolling bands, check the result on a ten-second test render, and then let the plugin handle the full four-minute clip while she moves on to the toast sequence. The band disappears without turning the couple's faces into wax figures.
Dial back Time Radius when skin turns plastic
Out of the box, a couple of tweaks make the plugin behave better for real projects. Here's where I'd start:
- Time Radius. The default can be too aggressive for slow-motion footage. If your clip looks plastic, drop it to 2 or 3 frames and test again. For time-lapse with rapid exposure swings, push it higher—sometimes 8 to 10 frames—to give the analysis enough context.
- Detection Mode. The plugin defaults to a broad luminance analysis, but switching to Local detection when only part of the frame flickers—say, a neon sign against a steady background—prevents the algorithm from overcorrecting areas that don't need help.
- Render resolution for previews. In After Effects or Premiere Pro, set your preview to half or quarter resolution when dialing in settings. The processing is heavy, and full-res previews waste time while you're still experimenting.
Tip: Save your tweaked settings as a new preset if you shot the whole project under the same lights. It'll save a dozen small adjustments later.
Stabilize first so frame-to-frame analysis stays clean
Most first-time users trip over the same few things. The plugin works—it just works better once you sidestep these habits:
- Applying it before stabilization. Flicker Free looks at luminance frame-to-frame, and a shaky handheld clip sends that analysis sideways. Stabilize first, then deflicker, or the plugin chases motion it shouldn't.
- Ignoring the clip's color space. If you're working in a wide-gamut or log profile, the luminance math can misread exposure shifts. Apply a corrective LUT or a basic contrast adjustment before the plugin, then fine-tune the grade after the flicker is gone.
- Processing everything at full duration on the first pass. The plugin analyzes as it renders, so a long clip with the wrong settings eats time. Mark a short representative section—ten seconds with the worst flicker—and test there first. Once it looks right, apply it to the full clip.
If you grabbed a copy to handle stubborn time-lapse flicker, these three adjustments alone can mean the difference between a clean export and a render queue full of wasted hours.
- macOS (Intel and Apple Silicon native)
- A compatible video editor that accepts third-party plugins
Questions from the stall
Does Flicker Free work on footage shot at high frame rates?
Yes, it is designed to handle flicker in high-frame-rate footage, analyzing the rapid luminance changes that become more visible when shooting above standard frame rates.
Notes from other shops 0
Sign in or open a shop account to leave a note.
No notes yet. If you've used this on a shop Mac, tell me how it went.