
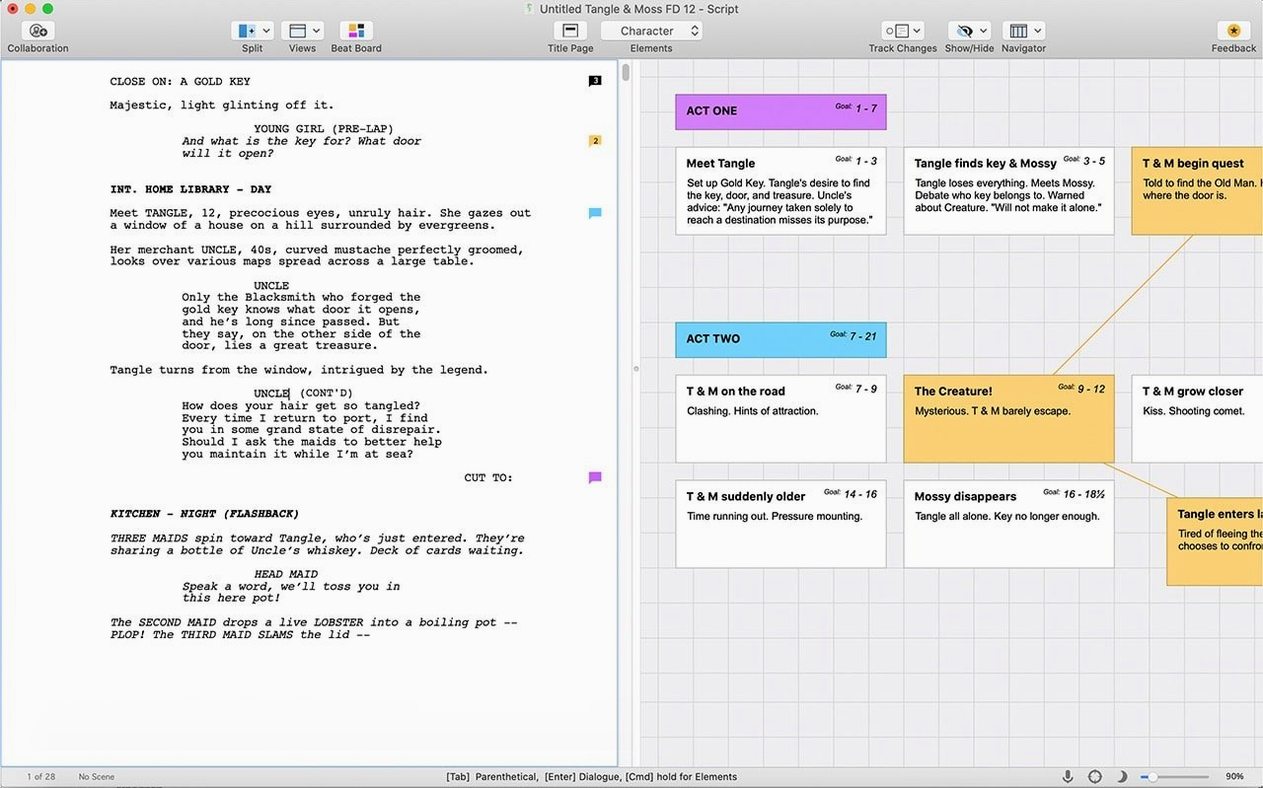
Version 13.4.0 rolled in a handful of minor bug fixes, so the app stays steady while you write. If you’re working on a screenplay, teleplay, or stage play, this is the tool that handles the formatting so you don’t have to.
Who is Final Draft actually for?
Anyone writing a script meant for a producer, a crew, or a stage manager. It’s built for film, television, and theatre work where standard formatting isn’t optional.
Needs macOS 12 Monterey or newer, plus a quick sign-in
Yes. Final Draft 13 for Mac needs macOS 12 Monterey or newer, and it runs on Intel machines. You’ll also need an internet connection for the first sign-in.
Turns your script into a navigable outline
Tell SmartType lists to stop learning names you’ll never use again
Out of the box, Final Draft gets a lot right, but a few tucked-away preferences can save you friction later. These are the ones I’d adjust first.
SmartType lists. By default, the app remembers character names, scene headings, and locations as you type, then suggests them. That’s helpful, but it can also pick up typos or placeholder names you meant to delete. Open Document > SmartType and prune the lists early. While you’re there, turn off “Learn new words automatically” if you’d rather add terms manually—fewer ghosts in the autocomplete dropdown.
Backup and auto-save timing. Go to Final Draft 13 > Settings > General and check the auto-save interval. The factory setting is every ten minutes, which is fine for most days, but if you write in bursts or your Mac’s battery is unpredictable, bump it to every three minutes. Also make sure “Create backup when opening” is checked. It won’t clutter your drive; the backups stay inside the FDX file, so you always have a fallback without managing extra documents.
Spell-check scope. The built-in spell checker can run on the entire script or just the current scene. I leave it on “Entire Document,” but if you collaborate with someone who sends back long notes inside the script text, you’ll want “Current Scene” while revising—it skips the note fields and stays out of your way.
Page count from zero. If you work in television, your title page and cast list might not count as script pages. Under Document > Header and Footer, you can set the first numbered page to be something other than one. Small thing, but it saves a conversation with the script coordinator later.
Pick a TV template and build your episode act by act
Let’s say you’re writing a half-hour comedy episode—cold open, three acts, a tag. Here’s a path you might take from start to finish, leaning on what Final Draft actually does well.
1. Pick a template that matches the job. Don’t start from a completely blank document. Go to File > New from Template and choose a TV template—there are options for multi-camera sitcoms, single-camera half-hours, and hour-long dramas. The template already has act breaks, scene numbering, and the correct title-page fields. That’s one less thing to build by hand at two in the morning.
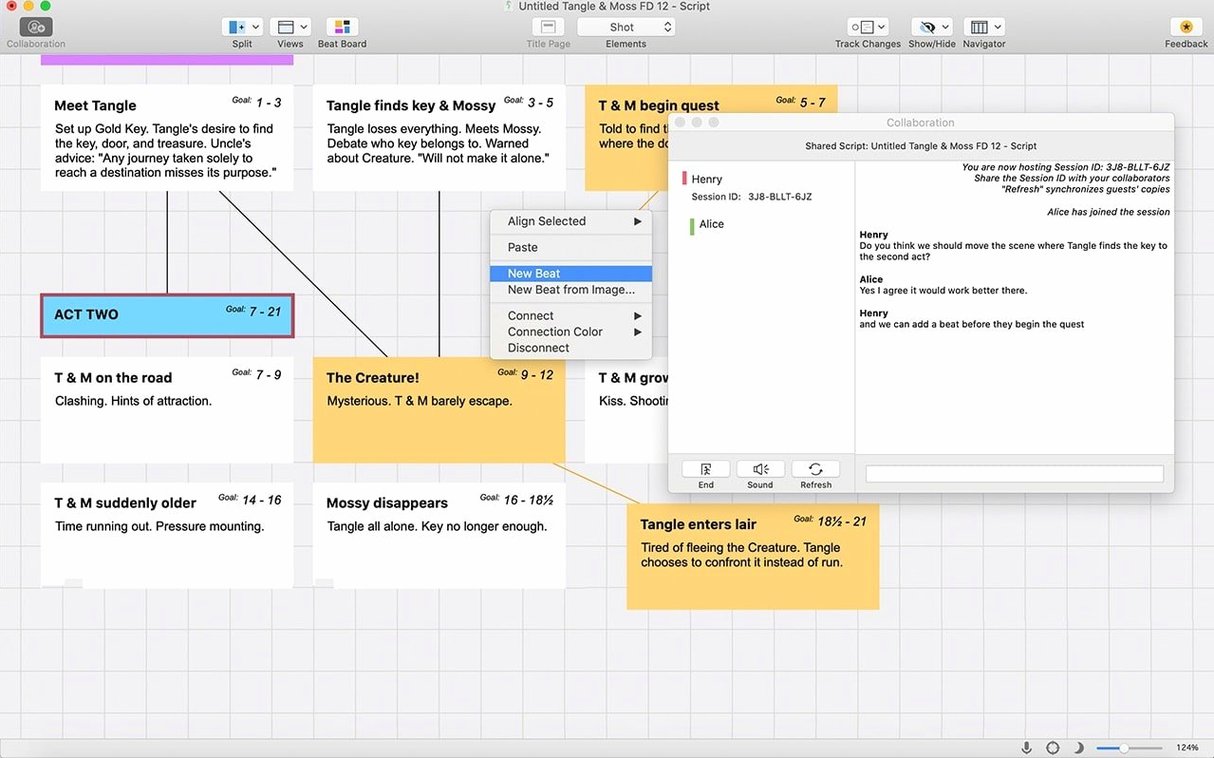
2. Outline with Beat Board first. Before you write a single line of dialogue, open the Beat Board from the toolbar. Drop a card for the cold open, one for the A-story turning point in Act One, another for the B-story runner. Flesh out each card with a sentence or two about what happens. Then drag the cards into the order that feels right. The board doesn’t force a structure on you—it’s just sticky notes, but they stay visible while you write, which helps when you lose the thread at page fourteen.
3. Write scenes in chunks, not sequentially. You don’t have to write from page one onward. Use the Navigator panel to jump to any scene heading in your outline. Write the scene that’s clearest in your head first, even if it’s Act Three. The Navigator updates scene headings automatically, so when you rearrange later, everything renumbers without a fuss.
4. Tag characters and locations early. As you introduce a character, select their name and open the ScriptNote panel. Add a quick tag—like “series regular” or “guest star.” Do the same for locations. Later, when the producer asks how many speaking roles are in the episode, you can generate a report in seconds instead of counting by hand.
5. Lock pages before sending. When the draft is done and you’re about to email it to the showrunner, go to Production > Lock Pages. This freezes the page numbers. If you revise later and new pages get added, the app uses revision-mode coloring and page-number suffixes automatically. The locked draft becomes your reference, and everyone on the production side knows which version they’re looking at.
Create a scratch file and break it on purpose before your real project
The first forty-eight hours with a new scriptwriting tool can feel like you’re learning the software instead of writing. A few habits can flip that.
Make a scratch file and break it on purpose. Before you open a real project, create a blank document—any template—and type nonsense. Hit Tab, Enter, and the arrow keys intentionally to see how the app moves between elements. Type a character name that’s three words long and watch how the formatting responds. Better to learn the rhythm of element switching in a throwaway file than in the middle of a tense dialogue scene.
Set up your title page right away. Even if your script is just an idea, fill in the title-page fields under Document > Title Page. The fields are pre-labeled for film and TV credits, and having your name and a working title there makes the project feel real. It also populates the PDF export correctly from day one.
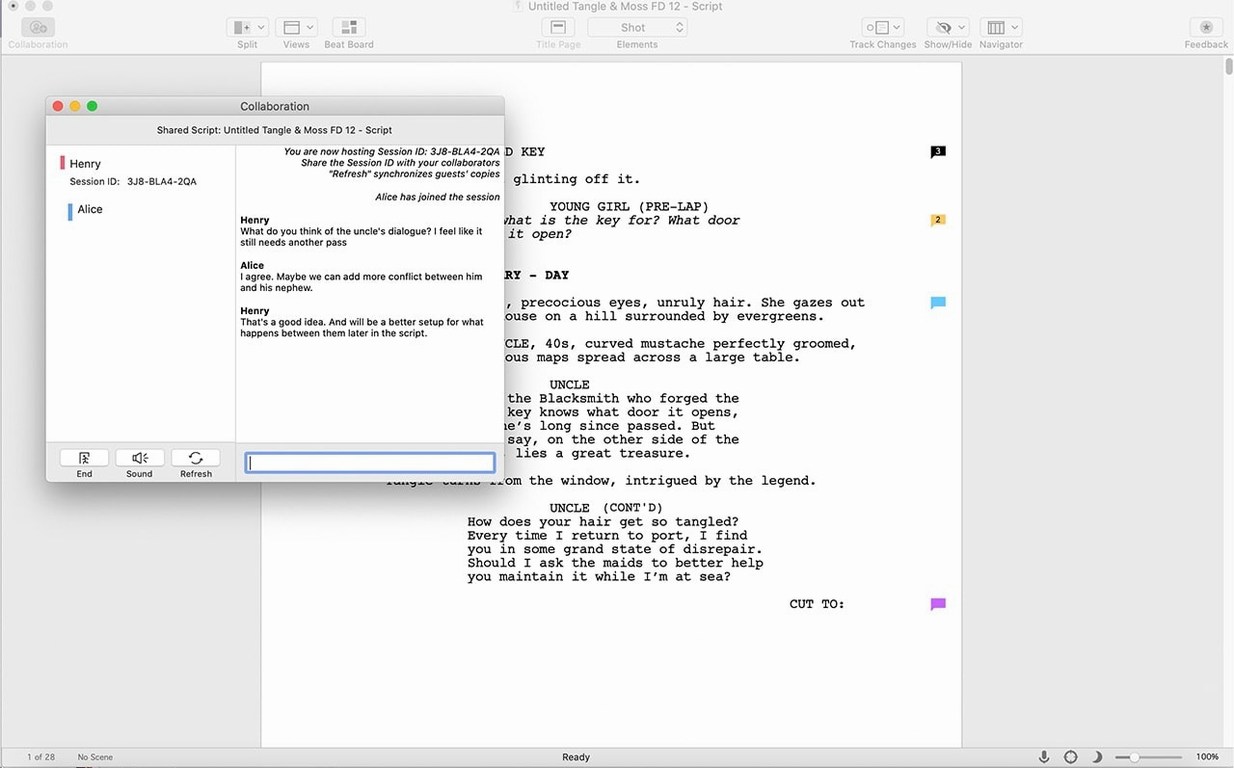
Don’t ignore the ScriptNotes panel. It’s easy to treat ScriptNotes as an afterthought, but using it from the start turns it into a running log of decisions. Note why a scene was cut, where a piece of dialogue came from, or what a producer asked for. When you revisit the script weeks later, those notes are the difference between picking up where you left off and staring at a line wondering what you meant.
Run a report on your first few scenes. Even if nobody’s asking for one, go to Tools > Reports and generate a cast list or a scene summary. Seeing your characters and locations listed out reveals gaps—like a character who appears once and vanishes, or a location that’s mentioned but never used. It’s a self-editing trick that costs two clicks.
Tab and Enter do all the element-switching heavy lifting
Some of the best features in Final Draft don’t announce themselves. They just sit there, waiting to shave seconds off repetitive work.
Tab and Enter do the heavy lifting. Tab switches you to the next element type—from scene heading to action, from action to character name. Enter ends the current element and drops you into the next logical one. If you ever find yourself reaching for the mouse to change a paragraph style, try Tab or Enter first. Nine times out of ten, the app guesses correctly.
Control-1 through Control-9. These jump you directly to a specific element type. Control-1 is scene heading, Control-2 is action, Control-3 is character, Control-4 is dialogue, and so on. Memorize the ones for scene heading, action, and character, and you’ll format faster than you can think about formatting.
Drag-and-drop in the Navigator. You don’t have to cut and paste scenes manually. Open the Navigator from the right-side toolbar, grab any scene heading, and drag it to a new position. The app renumbers scenes and keeps all the text intact. It’s the fastest way to restructure a draft, and it works across acts and even between documents if you have two projects open.
Revision mode isn’t just for production. Turn it on under Production > Revisions even during early drafts. Set each revision pass to a different color. When you look back at a scene two weeks later, the colored text tells you what changed in which sitting. It’s a lightweight version history without ever leaving the script.
ScriptNotes can hold full scenes. If you cut a scene but think you might use it later, don’t paste it into a separate document. Select the whole scene, right-click, and choose “Add ScriptNote.” The text stays inside the project, attached to the spot where it was removed. Months later, you won’t have to search through a folder of orphaned files.
Page-count target in the status bar. At the bottom of the window, next to the word count, there’s a small field where you can type a target page number. The status bar then shows how close you are to that target as you write. It’s a quiet motivator for hitting a daily goal without opening a separate tracker.
Scrivener integration quietly reshaped how outlining works
Final Draft 13 wasn’t a cosmetic refresh—it brought a few changes that quietly reshape how a writing day flows. If you upgraded from an older version, these are the shifts you’ll notice most.
Scrivener integration changed the outlining game. The biggest addition in version 13 was the tie-in with Scrivener. You can now move an outline or a corkboard from Scrivener directly into Final Draft, and the beat-level structure translates into scene headings and script notes. For anyone who does heavy pre-writing in Scrivener, this removed the copy-paste slog between the two apps. The outline arrives mostly intact, and the formatting stays clean on the Final Draft side.
Outline Editor got a real productivity bump. In earlier releases, the Outline Editor was a lightweight list view. Now it handles drag-and-drop reordering, color labels, and inline notes. You can outline in more detail without jumping to the Beat Board, which suits writers who prefer a single-column text view over sticky notes. It also syncs with the Navigator, so reorganizing your outline reorganizes the script.
Focus Mode appeared. A toggle hides everything except the current scene—no Navigator, no toolbar, no page count. It’s a small feature, but for writers who get distracted by the chrome around the page, it makes the app feel lighter. Tap Escape to exit it, and you’re back in the full view. No menu diving required.
Night mode works across the whole interface. Older versions had a dark page view, but the toolbars and panels stayed bright. Version 13 extended the dark palette to the entire window, including ScriptNotes, the Navigator, and the Beat Board. Late-night writing sessions are easier on the eyes, and the contrast settings are adjustable—you’re not stuck with a harsh white-on-black look if that’s not your preference.
Export to PDF got smarter about notes and title pages. The PDF export now includes options to attach ScriptNotes as endnotes or to strip them entirely, and the title-page fields respect the “include on first page” toggle more reliably than before. If you send drafts to readers who want clean pages but also a reference copy with your notes, you can generate both from the same export dialog without changing the document itself.
Bug fixes in 13.4.0 kept things stable. The latest update was light on new features—mostly under-the-hood fixes. Scenes that occasionally lost their numbering after a drag-and-drop move are now stable. A handful of crashes related to the Beat Board on older Intel Macs were addressed. For everyday use, it means fewer interruptions and less manual renumbering, which is exactly what a point release should deliver.
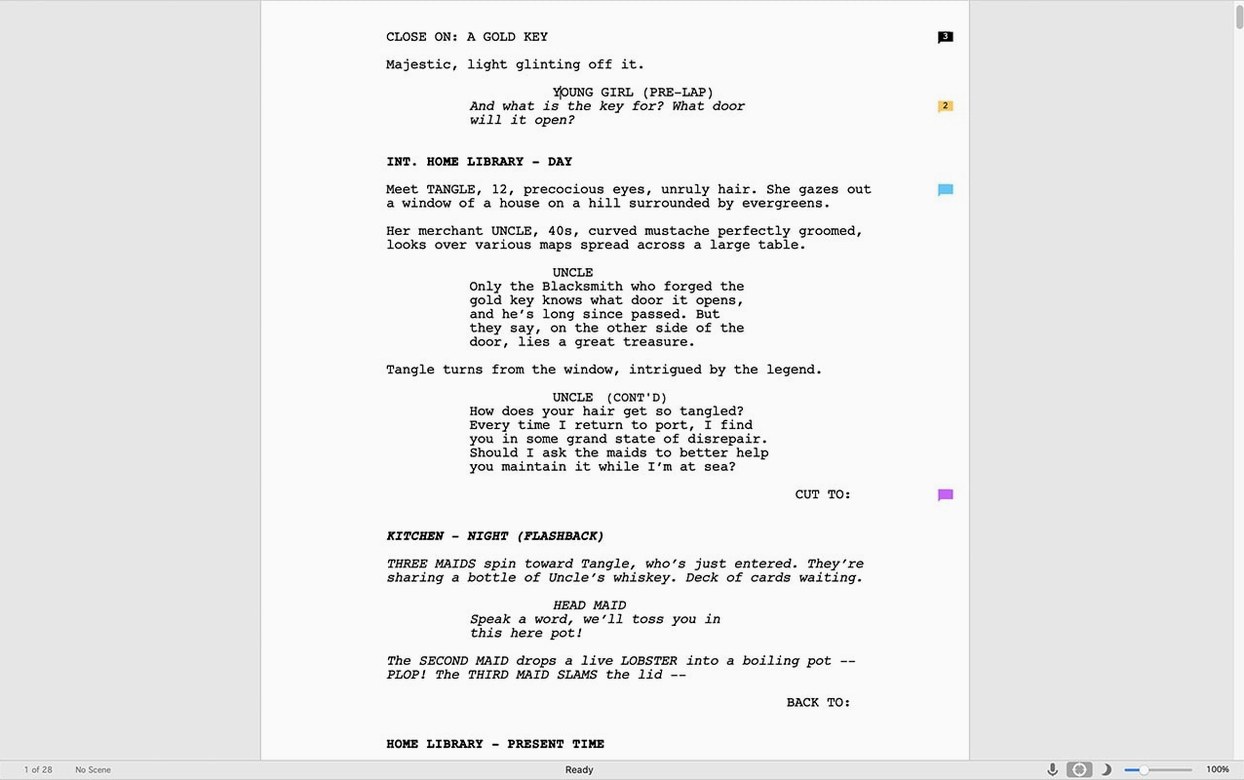
It auto-formats your text into proper script layout—character names, dialogue, scene headings—so your pages look like what the industry expects, right from the first draft.
- Minor bug fixes keep things running smoothly.
- macOS 12 Monterey or later
- Intel processor
- Internet connection for initial sign-in
Questions from the stall
Can I use Final Draft on both Mac and Windows?
Yes, Final Draft works on Mac and Windows computers, so you can collaborate across platforms.
What kind of scripts is it for?
It’s designed for film scripts, television episodes, and stage plays.
Do I need to be online to write?
An active internet connection is required only during the initial sign-in, not for everyday writing.
Notes from other shops 0
Sign in or open a shop account to leave a note.
No notes yet. If you've used this on a shop Mac, tell me how it went.